Right then,
I don't know if anyone had a chance to see this over at Arnies or the ww2aa boards, but I thought I would whore it ou....er um..share it with you all here. I have been threatening to write this up for a while now and weekend after weekend comes and goes and I seem to find something else more exciting to do than sit down and write a 'How-To weather your rifle' article.
Its my own fault of course, if I didn't have this selfish obsession with photographing my guns and plastering them all over the interwebs, no one would ask how to do it......
Oh well I dont see myself stopping the photography anytime soon, so I'd better get this article behind me.
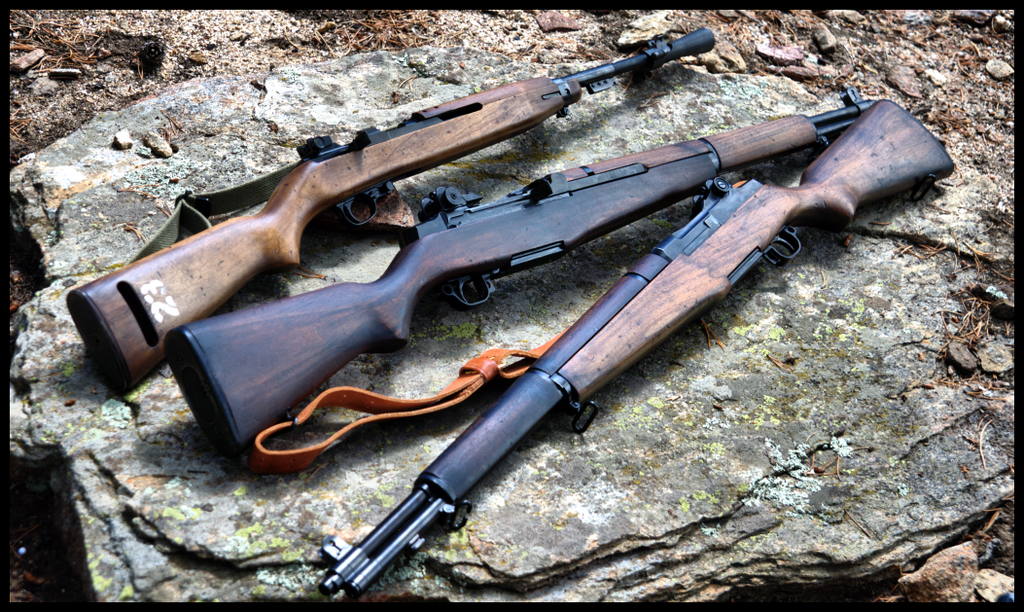
We're here today to talk about how to turn this:
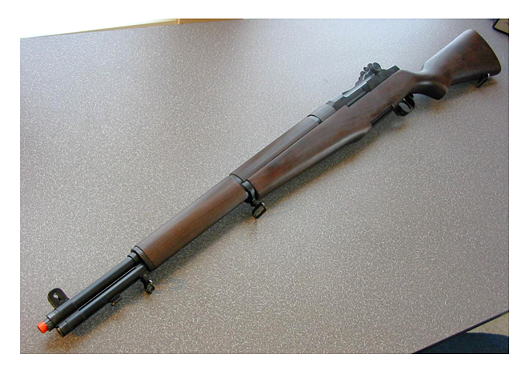
and this:
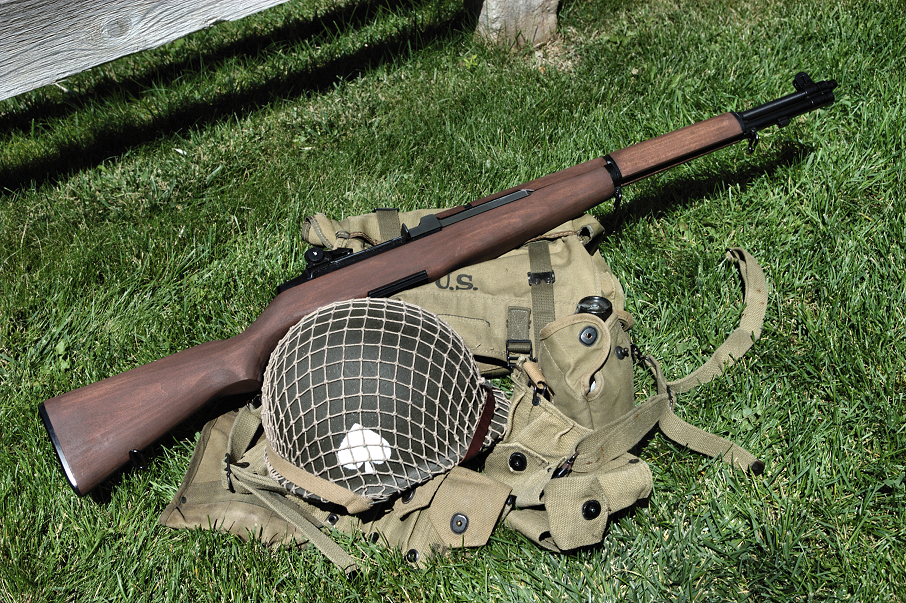
...Into this:
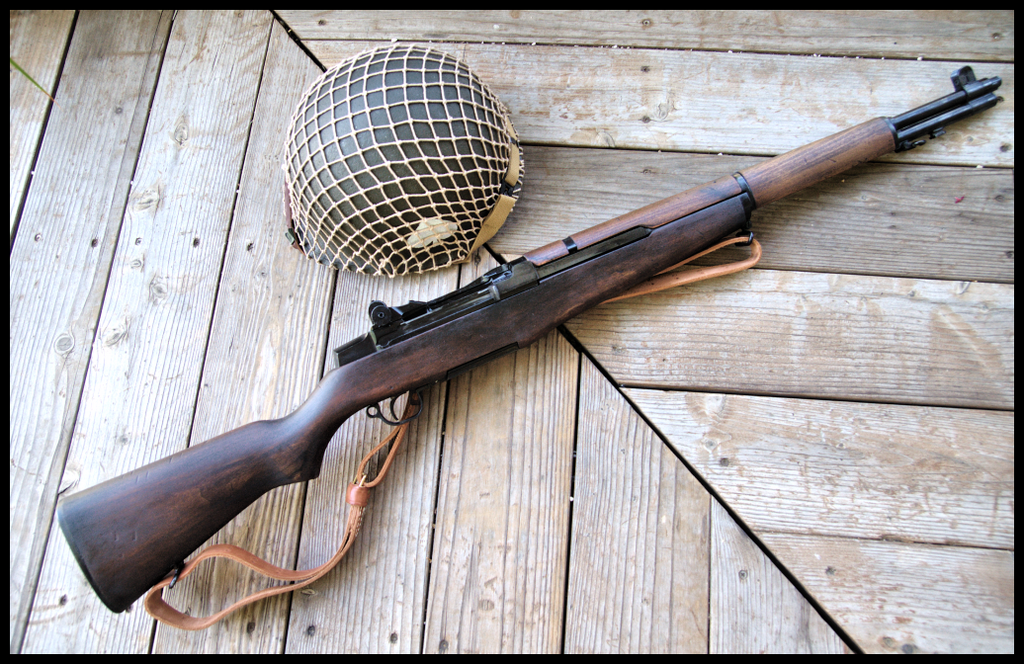
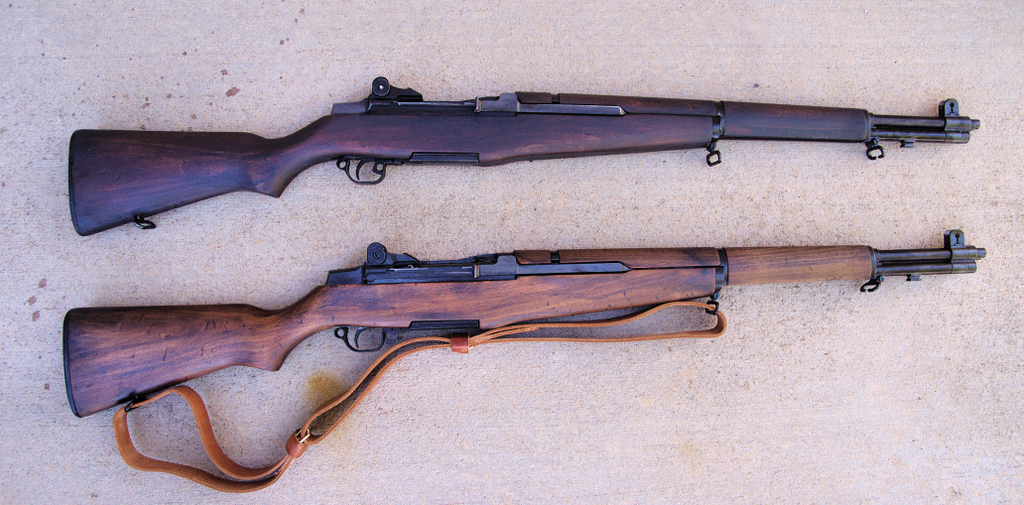
For this tutorial I will be adding on to to articles already written here:
Basically this process involves a bit of sanding, a bit of painting, a bit of abuse, and a fair bit of imagination.
You have to be able to step out of the "I just spent how much on this beautiful wooden rifle and your seriously suggesting I take a hammer and the handel of a screwdriver to it??...are you mad??" mindset of the weapons owner, and imagine your that battle-weary soldier in the Hurtgen Forest in 1944 and as your ammo runs out, you may just have to use this Garand as a club to survive....
Thats the use and abuse that real weapons of war see, so why not bring that level of immersion and 'milsim' to your Airosoft impression and give your gun the battle-hardened appearance of a real veteran? Don't worry, it's easy to do, and this guide will show you how.
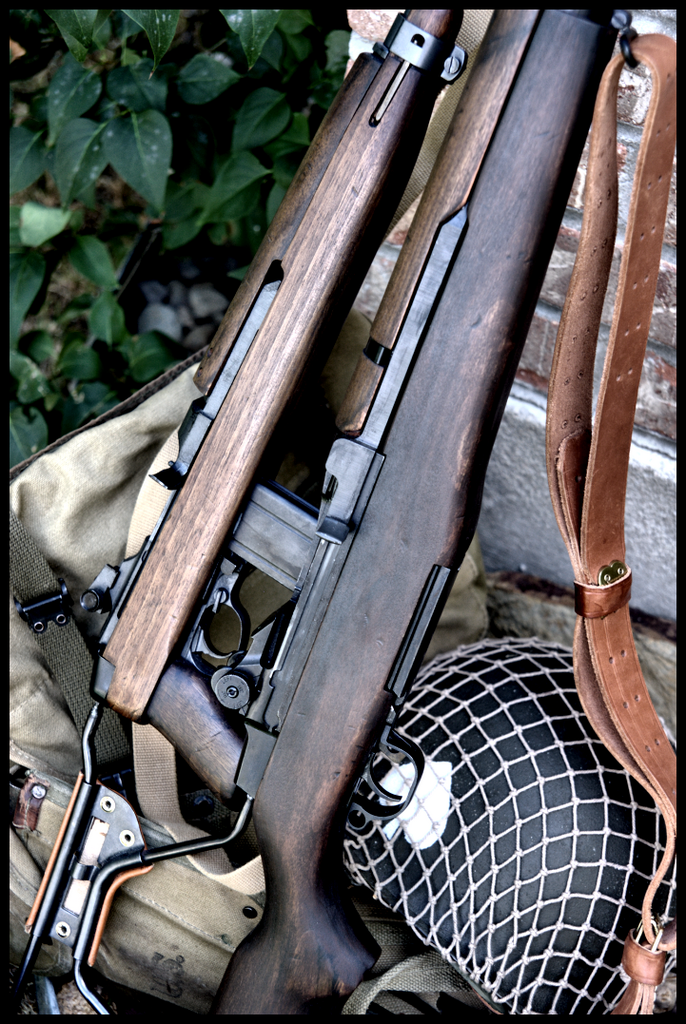
Preparation
-Materials:
Here is a list of items to pick up form yoru local arts & crafts store (Michaels, Hobby Lobby) and your local hardware store.
Arts & Crafts Store:
Acrylic Paints- Generally around $2 bucks a bottle. Good because they are water-soluble, mistakes can be easily fixed.
-Black For getting a rich, dark effect on any color wood
-White For rack number stencils or to mix with other colors
-Off-White or Tan For aged stencil painting
-Assorted Browns, Nutmeg, Dark Brown, Coffee For darkening or changing the wood color of gun stock
Hardware Store:
Sanding Block Foam sanding blocks make sanding the stock a little easier on the hands. Usually around $3.50 Get one medium grit and one fine grit.
Steel Wool Comes in bags with a bunch of steel wool pads, I think thats like $5 bucks. This is for fine sanding and buffing of metal edges to show wear. Works great on M16's or metal magazines.
Linseed Oil For any wood furniture gun you are working on, after you complete the sanding, distressing and final application of the acrylic paints and wipe-off, it is important to apply linseed oil to protect the wood as well as give the gun that authentic luster that a real steel weapon would have. Get the smallest container they have, about $4 dollars.
Foam corner brushes The black foam brushes for painting corners, get a few 1" inch, and 2" inch brushes, shouldn't be more than .50 cents each.
Optional Stuff:
Stencils Can be found in hardware store or Arts & Crafts, I found better ones at the crafts store, but if you have maybe an M1 Carbine or M2 or even an M16 or M14, you could add a rack number to the stock.
Tools Needed:
Hammer
Big, Plastic handled Screwdriver
Standard weapon disassembly tools, screwdrivers, allen wrences, etc.
Cloth Hand Towels or Shop Rags
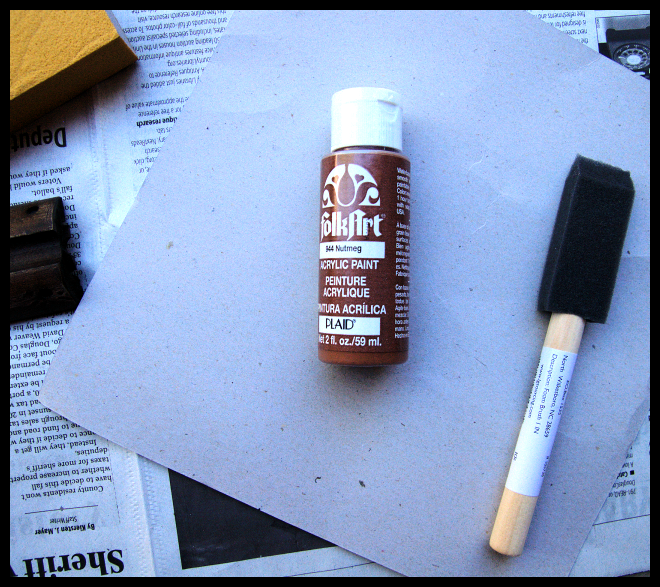
Step One- Work area Prep
Clear off a large area of a desk, or better yet, one car bay in the garage. You are going to be dealing with sanding dust, paints, water, linseed oil, all kinds of things that generally aren't 'inside project friendly' so the best place to do this is in the garage.
As with any project of this type, lay down plenty of newspaper as a blotter for the paint and to protect the pieces to be worked on as well.
If possible I like to be close to the ground, not standing at a workbench, that way parts have less distance to fall and get buggered up I think, but to each his own. I just use a cooler as a table and another cooler to sit on.
As shown in the Garand article, it is always best to field strip the weapon down to its three groups to perform this work. regardless of with the the Iraquis
Step Two- Sanding
Here is where you will thank me for the foam sanding block suggestion. On any Airsoft replica that has wood furniture, there is a clearcoat layer that is the outermost layer of the finish, this gives the wood a shiny luster. This must be sanded down first of all to allow the acrylic paint to get into the grain of the wood and work, and to allow you to remove the original dark brown or maybe red color that was origianlly applied to the stock.
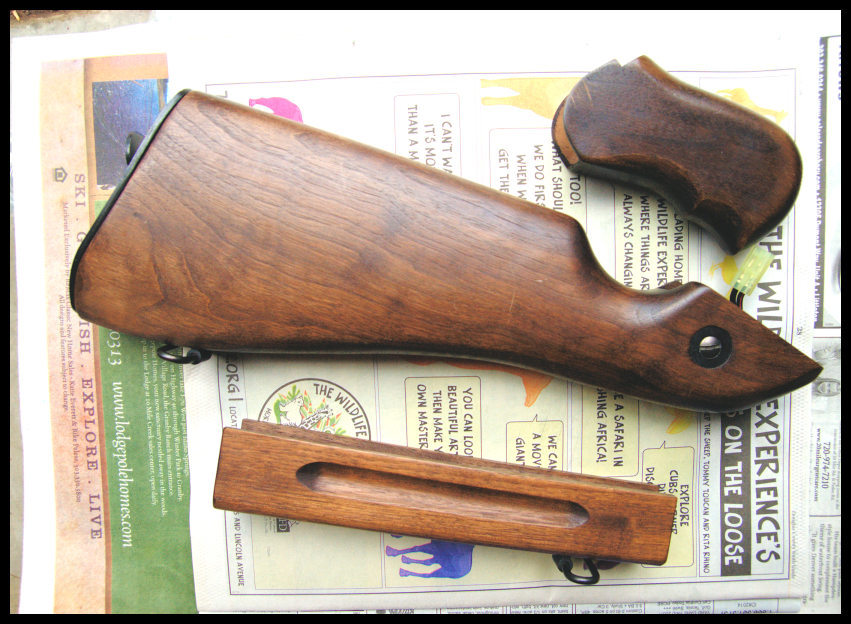
CAW wood kit original finish and color
This is a time consuming, manual process and the sanding blocks simply make it easier to get ino the nooks and crannies that conventional sand paper will not. Plus they generally fit your hand better so you avoid strain or cramps.
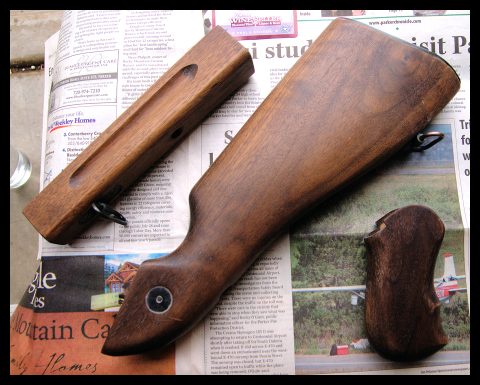
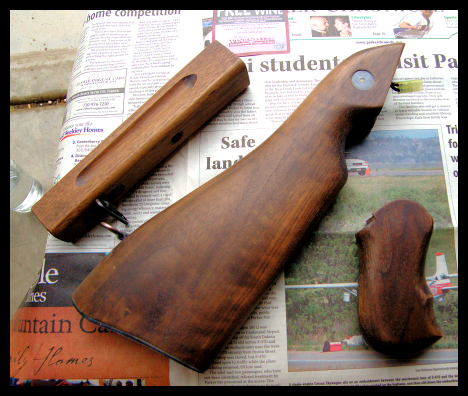
CAW Wood kit for TM Thompson after first sanding-
So sanding is really to accomplish two things, to remove the clear coat finish so that the paint will be able to get into the wood and stick, and secondly to remove whatever previous stain or paint color may exist on the wood. As stated this takes time, and effort, so be prepared to go through a couple of passes before your ready for the next step.
Best thing to do is sand an area, wipe it down, see if the clear coat luster is gone or the color from the stain is reduced or whatever effect you are looking for. Be careful not to sand too much and cause un-even areas or patches on the stock.
Step Three- 'Distressing'
Here is where you get to take your frustrations out on a defenseless, inantimate object......
This is where you are going to literally beat the S*%# out of the stock, handguard, whatever the piece of furniture maybe to give it that 'worn' used look.
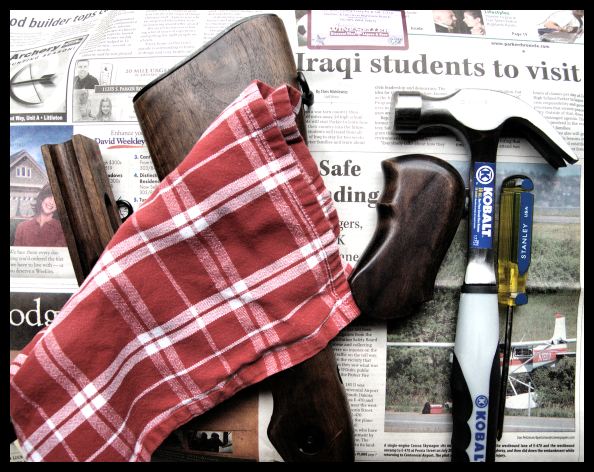
For this you will want your trusty hammer and plastic-handled screwdriver. Personally I use the screwdriver more than the hammer, but a good hammer-claw gouge in a stock always adds that war veteran look, haha!
Grab the screwdriver by the shaft and swing away at the stock. Imagine that every dent, scrape and nick is a rock, pillbox or Nazi helmet that is adding that 'character' to your weapon.
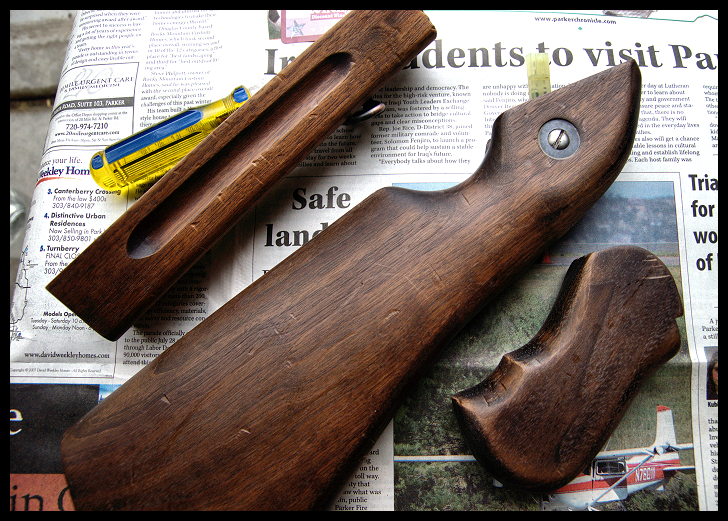
Thompson furniture after 'distressing' with screwdriver and hammer
After the 'beat-down' give the wood another sanding to remove any rough edges casued by the abuse.
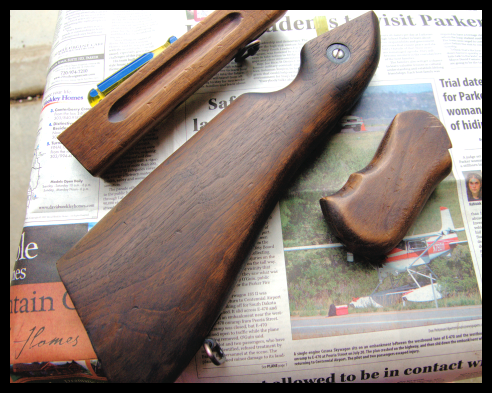
After distressing, after second sanding
Step Four- Painting
Now comes the real fun part. The part where you can really use your creativity and imagination, because it is here htat you decide just exactly how dark the wood is going to be, and how 'aged' the appearance will end up.
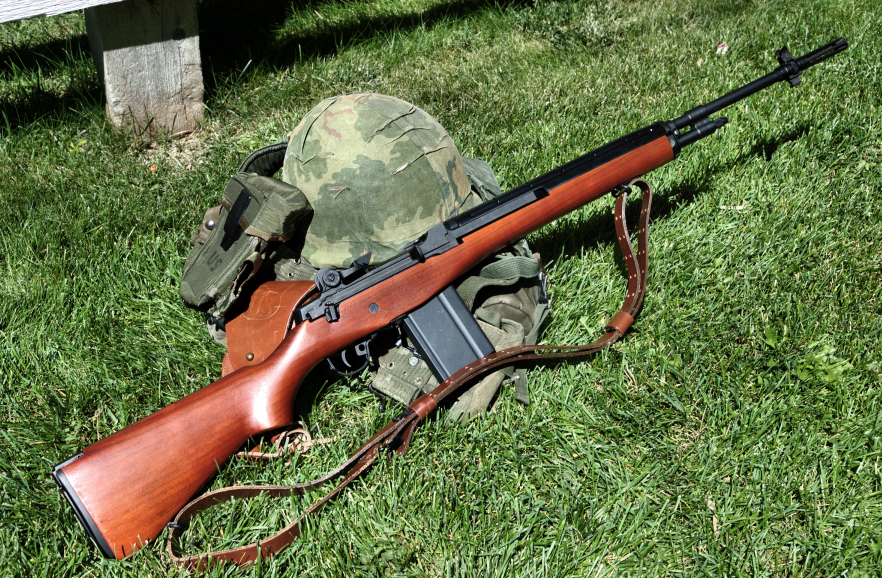
TM M-14 with ACM Wood kit 'Before'-
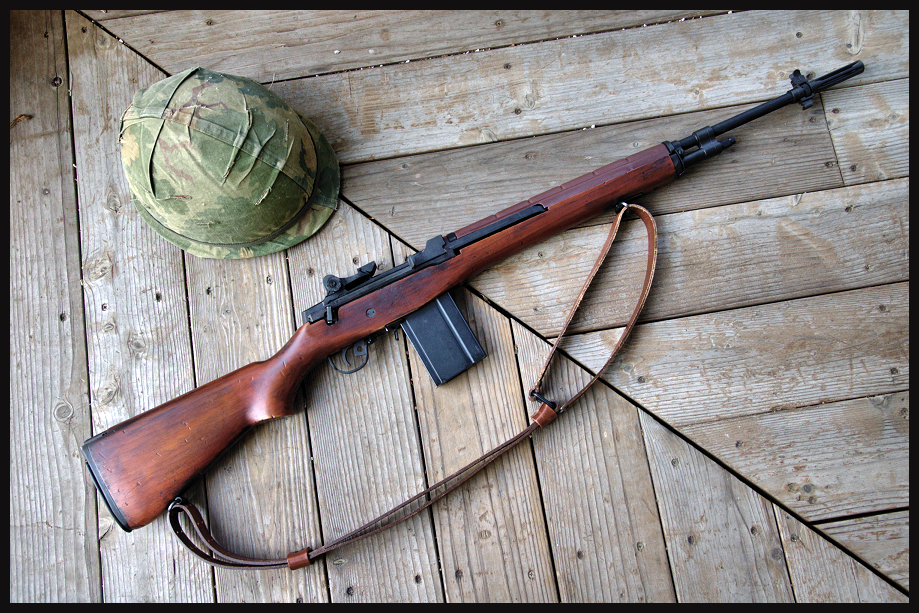
M-14 'After' process
Get yourself a little paper plate to mix up your paints in, its less messy. but the newspaper also works in a pinch. Dilute with water as you feel necessary, the more the color is diluted, the less the effect on the wood will be. In other words, if you want the new color dark, use more paint, less water.
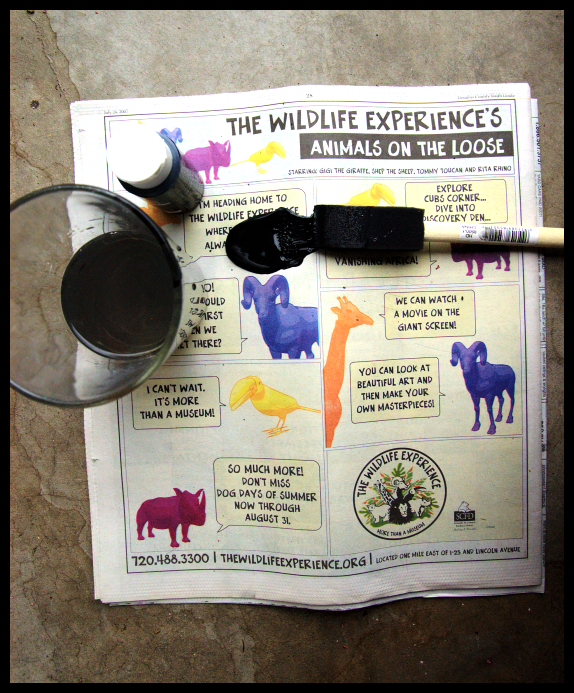
The painting process is as follows:
Paint an area, wait 10 to 20 seconds, wipe off paint.
You are simply 'washing' or brushing this color into the paint and then wiping the excess off- your not trying to completely paint the wood the black, or brown or whatever color your using- just giving it a 'stain' of the acrylic paint you are using.
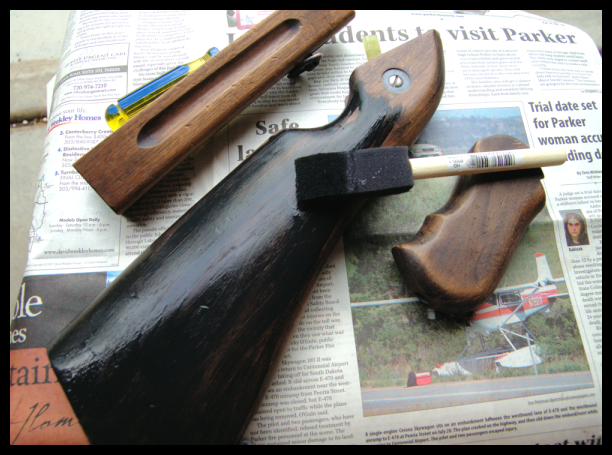
Thompson furniture with first black wash coat applied and drying
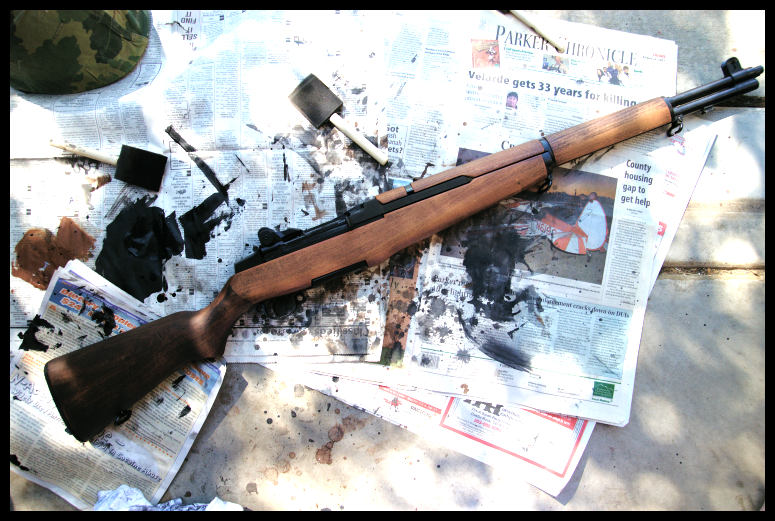
Starting at buttstock end of Garand
Remember, you don't want to leave the paint on very long. However, also remember if you do that your using acrylic paint for this exact reason! They are water soluble, so if you dilite the brush with water and go over the paint, you can wipe it right back off.
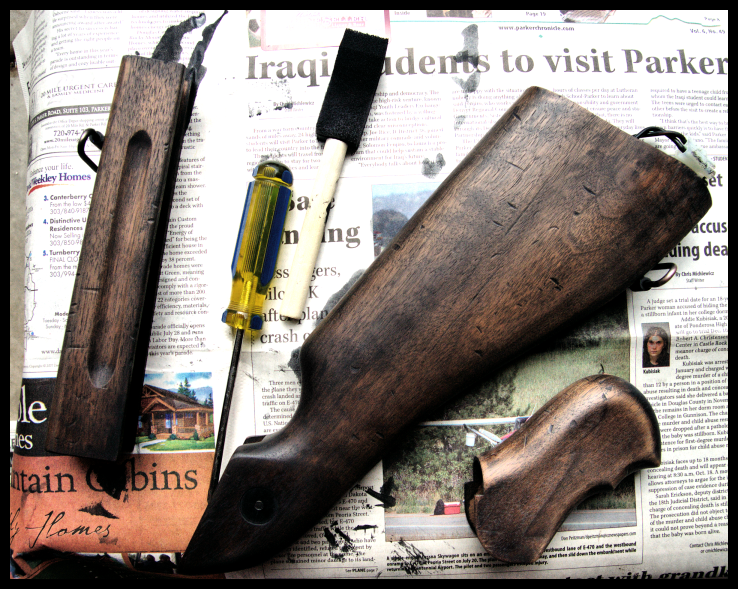
Here is Thompson stock after distressing and after the black acrylic paint wash and wipe
After the paint application and wipe down, you will notice that the 'flaws' or nicks and scrapes that you put in with the hammer and screwdriver now stand out due to being darkened with the balck paint. This is exactly the type of authentic beat-up appearance you are looking for! Well done!
The previous two steps can be repeated and redone to acheive the level of distress, or the paint color or darkness you desire.
Let dry..... (fortunately, acrylic paints are very fast drying ![]() )
)
Step Five- Linseed Oil
As stated earlier, after you have sanded the crap out of the stock and whatever other wood pieces your working with, then beat the crap out of them, then painted them and wiped them down, the wood is need of some treatment to keep it from getting all chalky from the acrylic paint.
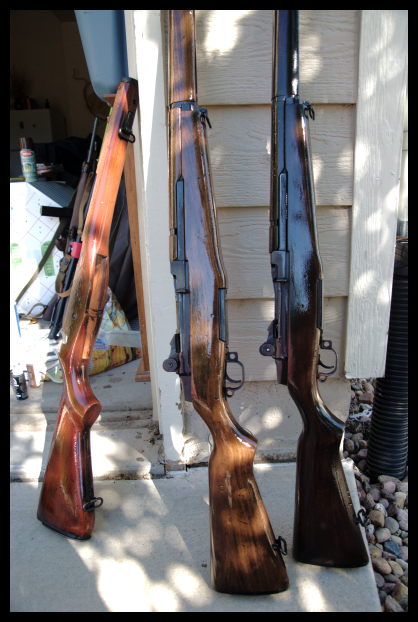
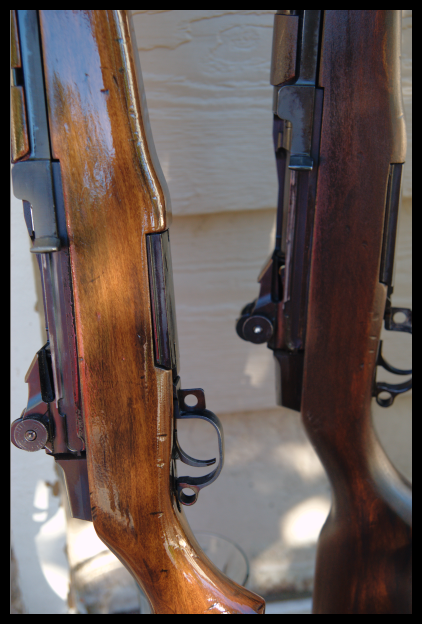
Closeup of linseed oiled stocks
I'm an impatient cuss (probably the adult ADD kicking in ![]() ) so I only let them sit and soak in the linseed oil for like 30 minutes or so- the longer the better, the wood they use is very thirsty.
) so I only let them sit and soak in the linseed oil for like 30 minutes or so- the longer the better, the wood they use is very thirsty.
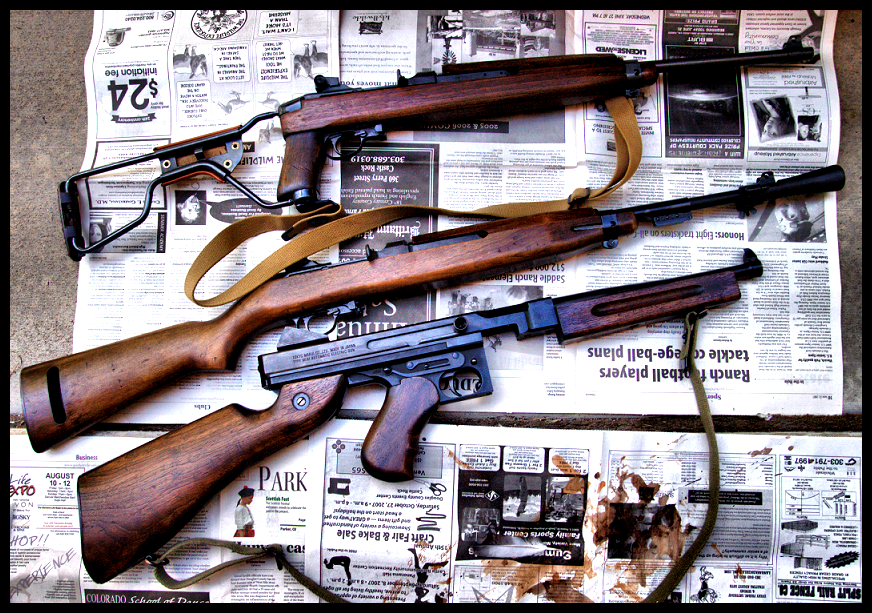
Thompson, M2 Carbine and M1A1 Paratrooper Carbine after linseed oiling
Conclusion
So, well yeah...that's pretty much it- Here's something that everybody can do and with a little practice and imagination you can take your weapon up to the level of realisim that you may have only had in your kit and clothing impression before!
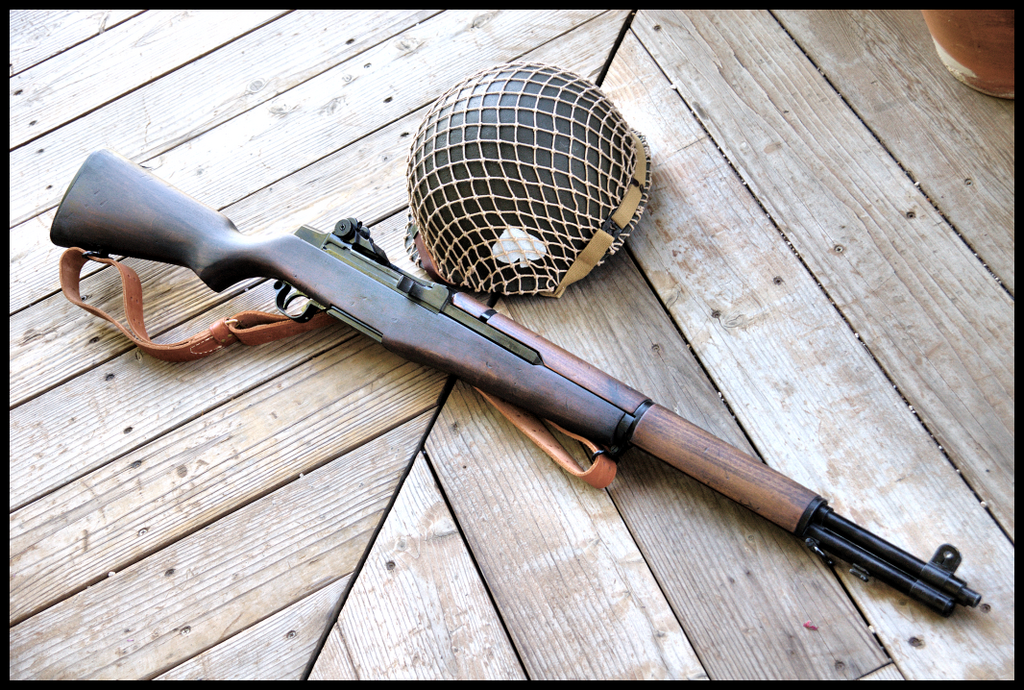
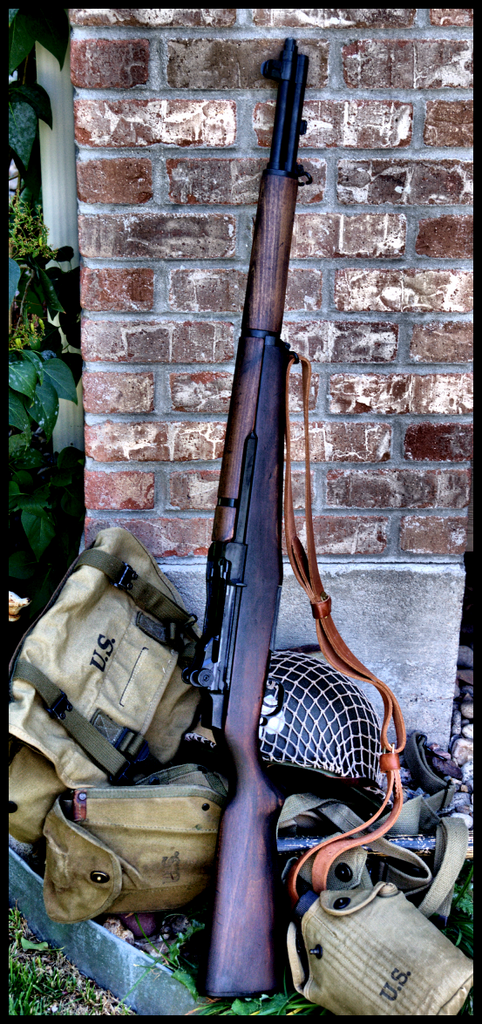
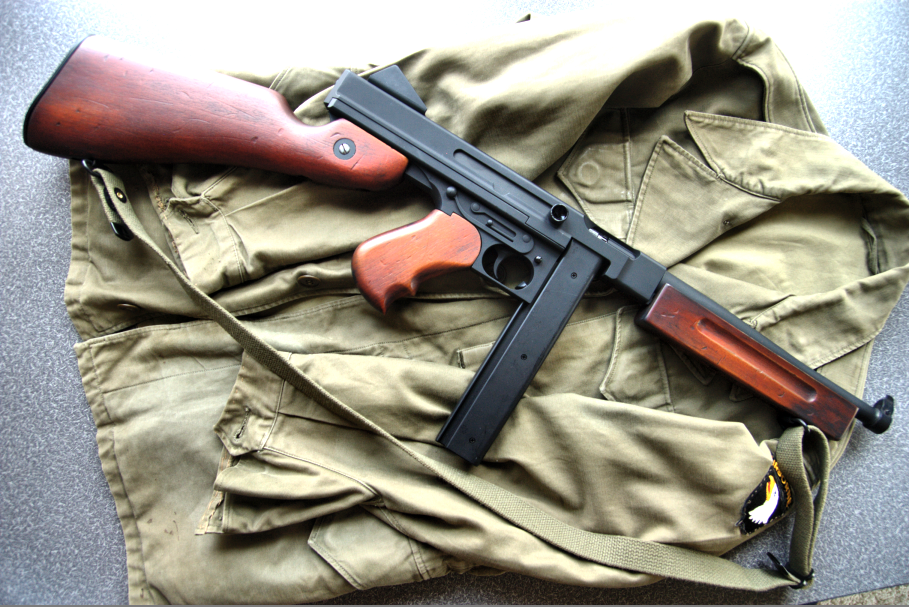
CYMA Thompson project
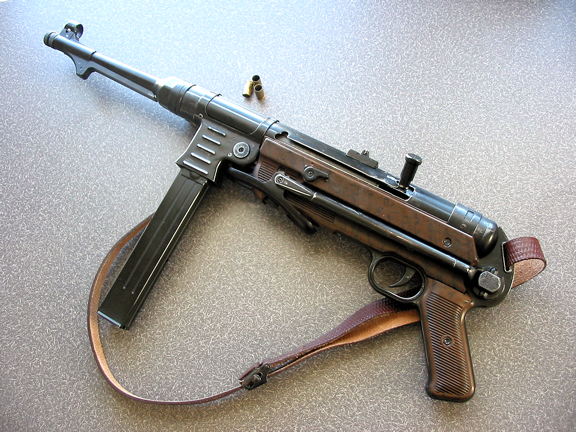
AGM MP40 project
Part II
Part II will present my method for creating a 'worn' look on metal Airsoft replica guns.
The goal is the replicate the wear and patina of battle-hardened weapons to add authenticity and feel to your Airsoft period reenacting impression. Many of us invest a lot of time, effort and creativity to make sure our clothing and gear is as correct and as authentic as possible, this process allows you to carry that over to your weapons system.
First a note: It would be easy and somewhat 'logical' I suppose to just bang and scrape the heck out of a metal replica to achieve the use and abuse that a rifle or handgun would receive over it's service life, however if you research weapons pictures that have been used or are being used in the field, you will seldom see guns that appear as though they have just been run through a wood chipper and put back in the gun rack. While 'scratches' are certainly a part of natural wear, what is more common is the fading or 'silvering' effect that comes from the greases and oils from hands or equipment used with these weapons. Leather holsters rub and wear down corners and leading edges from use- The acidic oils on our hands or faces will interact with gun metals and woods to change the appearance over time. Gouges and scratches are generally limited to the 'protruding' edges of a rifle such as the leading edge of an M16 gunsight, or the casing bulge, etc.
The best advice for anyone wishing to create this effect on their gun is to start by searching images of their particular weapon on the web, find as many pictures as you can to get an idea of how 'real guns' age and wear, then decide how much wear is appropriate for your weapon. Consult this guide for tips on how I did it- As usual feel free to ask me questions.
Let your creativity flow and have fun!
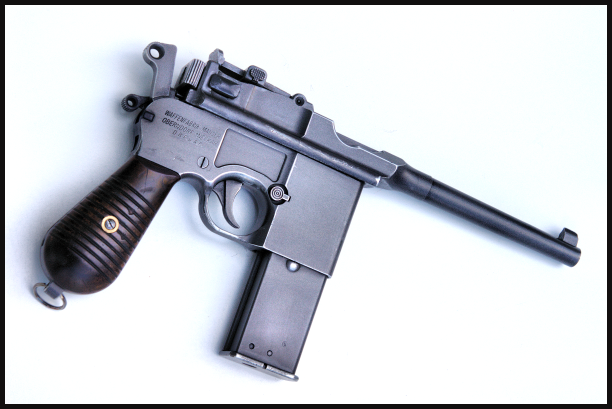
Finished veteran Mauser
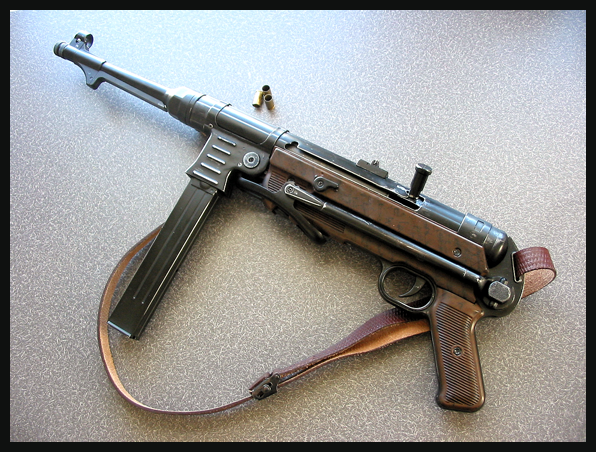
Finished veteran MP40
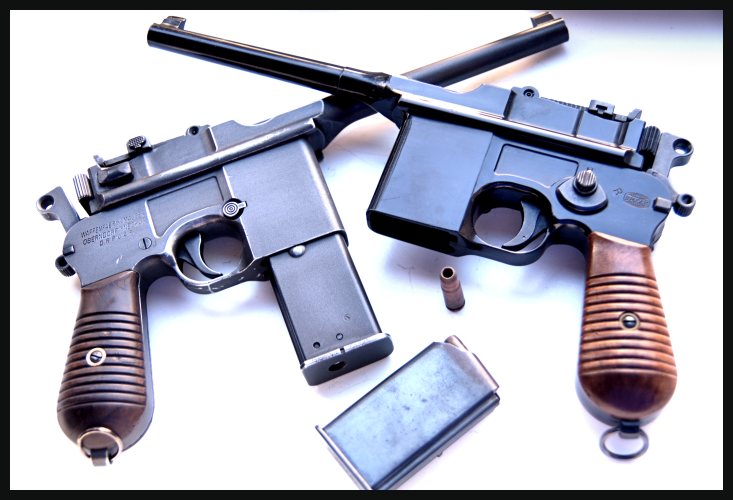
The Process...
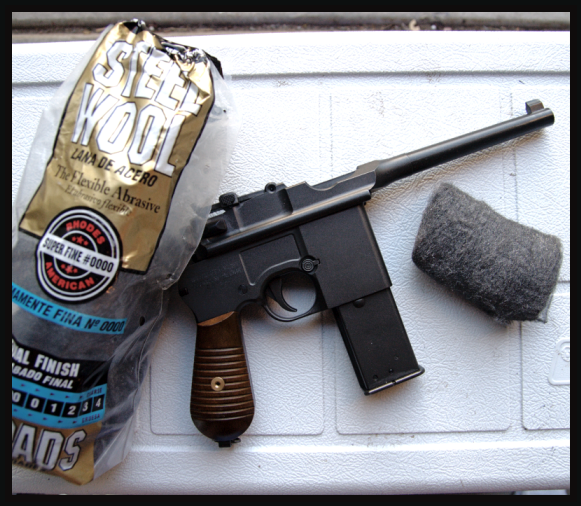
HFC Broomhandle Mauser prior to weathering with bag of 'steel wool' pads
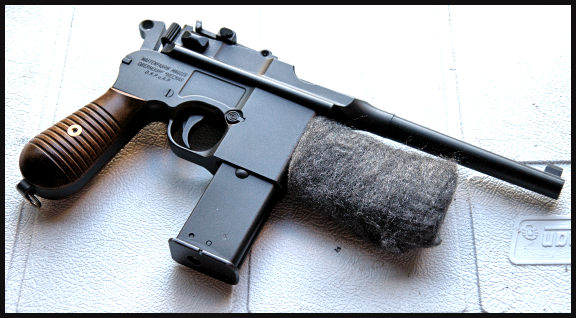
Metal HFC Broomhandle Mauser before weathering process....
Step 1 - Steel Wool
The types of metal used by Airsoft manufacturers varies with the most prevalent being so-called 'pot metal' which is a term given to an alloy of zinc and other metals (aluminum, copper, iron, magnesium, lead, zinc and other common metals) combined to form a reasonably sturdy, but mostly cheap, cost effective material for toy and parts.
Higher quality metals such as painted aluminum are also used in Airsoft replicas and more and more even steel is being used.
I begin the aging step on all my metal weapon projects using steel wool pads that are available from any hardware store for about $5 to $8 dollars a bag.
Steel wool is 'softer' and less abrasive than a sanding pad or fine grit sandpaper which makes it an excellent place to start the process. Until you gain experience and have a few projects under your belt its always a good idea to begin gradually, making small improvements or changes rather than drastic ones- Obviously if you make a mistake early on and 'ruin' your gun it will be frustrating and could be expensive or even impossible to reverse or repair.
Notice how the color and cast of the Broomhandle changed from a darker, almost blue color in the first 'pre-aging' pictures to a more authentic light grey after the steel wool application.
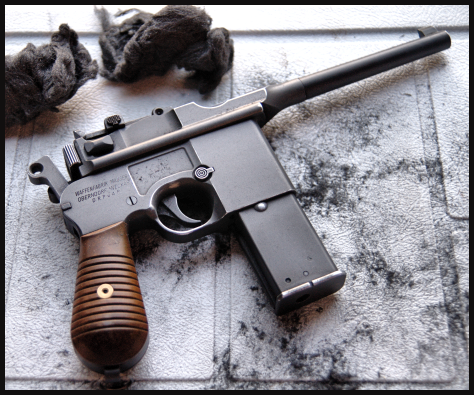
Beginning weathering
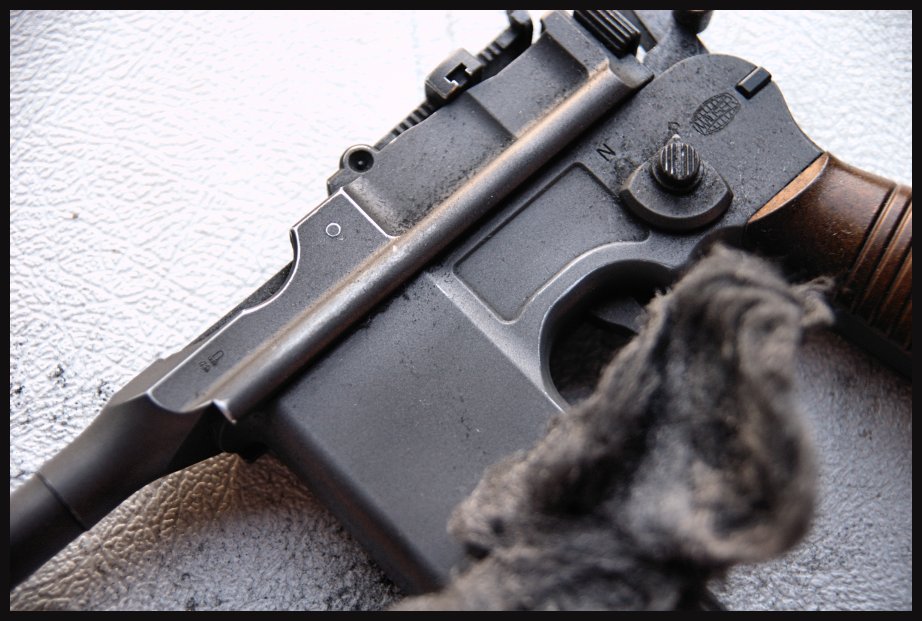
Closeup of Broomhandle, using steel wool
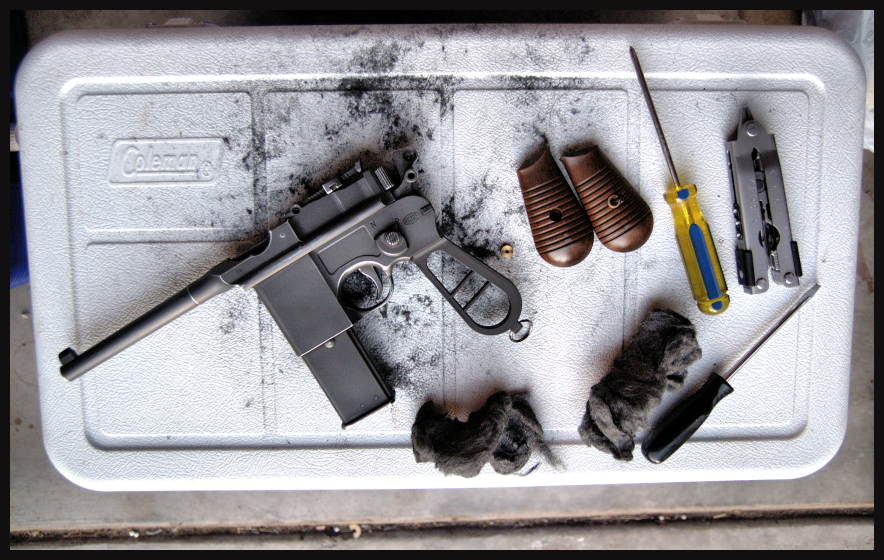
During process, using steel wool
Application:
Steel wool is great for buffing and will even out poorly applied finishes on many metal guns. It will bring out an authentic shine if used on the chalky finishes of many metal slide and frame kits for pistols.
Steel wool is also great for gradually removing paint from corners and leading edges of the gun as you move from simply 'buffing' a finish to a more aggressive aging effect.
The amount of buffing you chose to do depends on how 'old' or worn you wish to make the gun appear. Again, I prefer to move gradually. I have gone 'to far' on enough occasions that I have learned my lesson.
When buffing with steel wool, or lightly sanding with a sanding pad or a dremel, pay attention to the areas where you haold the gun and the controls. Buffing mag release buttons or hammers and trigger faces is correct as these places will naturally see the most use.
Its a good ldea to have a can of matching paint or gunmetal paint handy for mistakes.
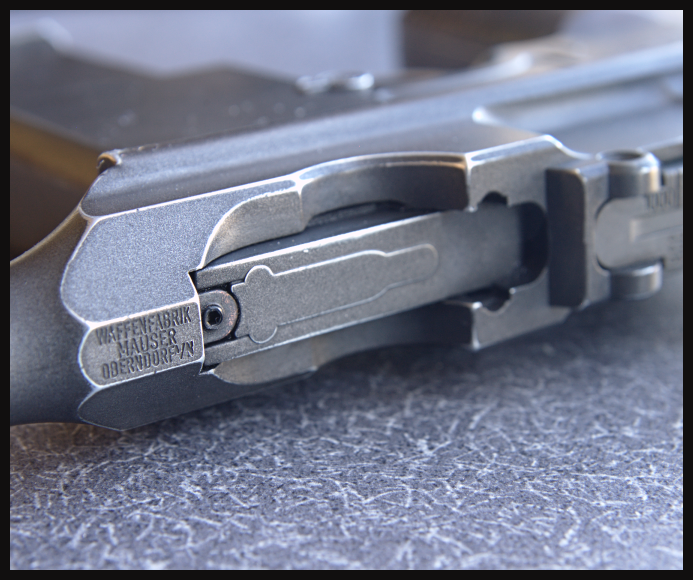
During process, using steel wool to wear edges
Step 2 - Distressing
Just like the process for 'distressing' wood stocks, I use common tools to create any gouges or scratches that I have decided to add to a metal replica. When working on my Mauser Broomhandle project, adding a few scratches and nicks seemed right, but I would likely never do this to a 1911 or even a rifle for that matter.
Again compare as many real-steel pictures as you can find as a guide.
Application:
Aging and distressing tools I use for metal replicas:
-File
-Screwdriver
-Tack Hammer
-Dremel
-Sanding pad
-Steel Wool Pads
If you decide a scratch or gouge is what your replica needs, always follow up and go over the area and buff with a steel wool pad to remove any sharp edges or burrs.
Remember: You are recreating the finish or appearance of a used weapon- Rough edges are generally worn down over time and with use.
I still depend on good 'ol steel wool to do most of the work, however the Dremel is a very handy tool to have for this type of work. Be careful though, like a rough sandpaper or sanding block, the dremel can work too fast and make too drastic a change if not used carefully.
Dremels are especially effective on metal replicas for quickly sanding down corners and shining up finishes. Again, use caution.
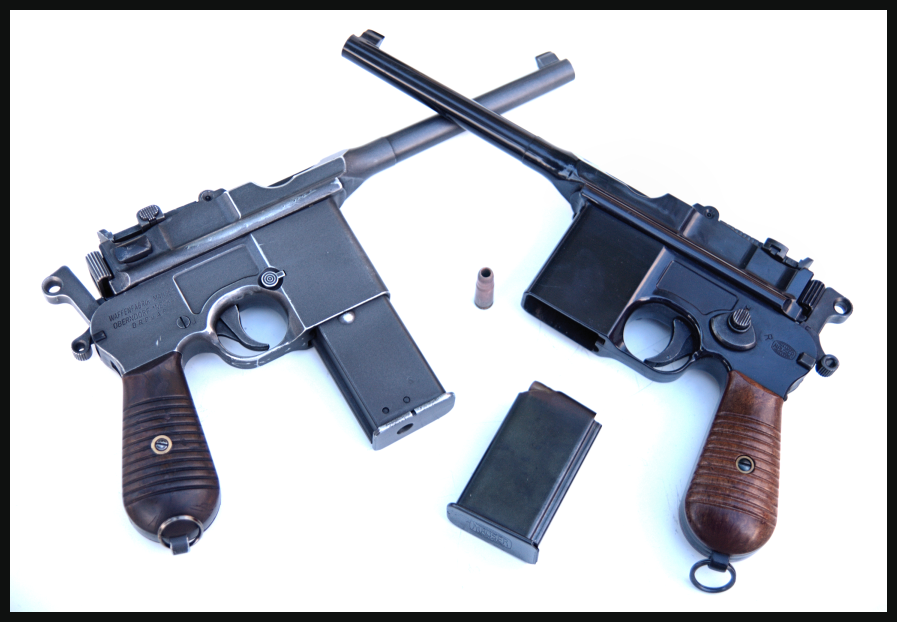
'Battle Worn' Mauser with Marushin 'blued' Mauser
And finally, here are some 'before' and 'after' pictures of the MP40 following the same process
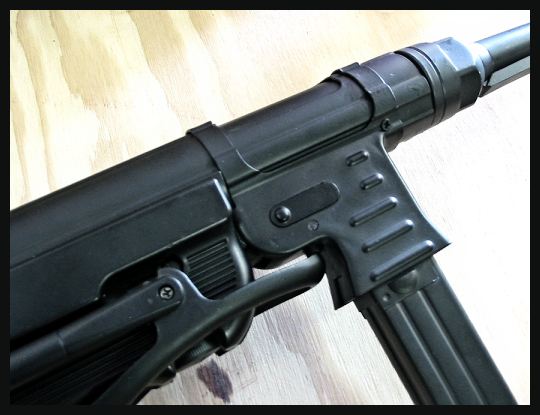
Right Side closeup -Before-
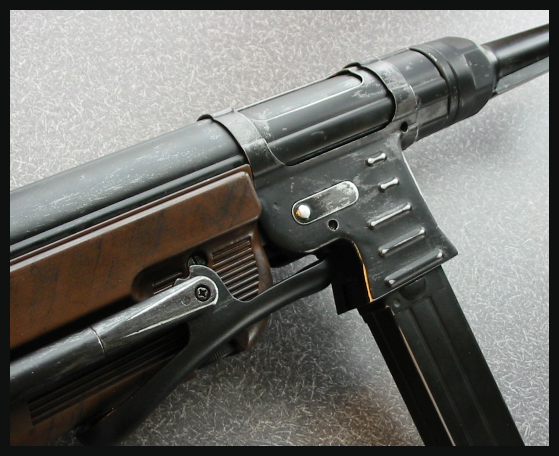
Right Side closeup -After-
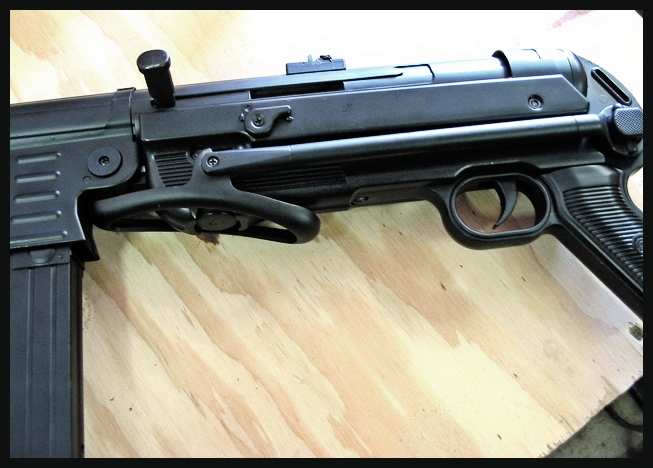
Left Side -Before-
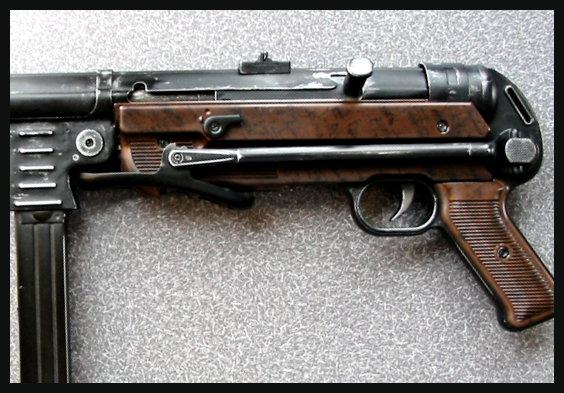
Left Side -After-
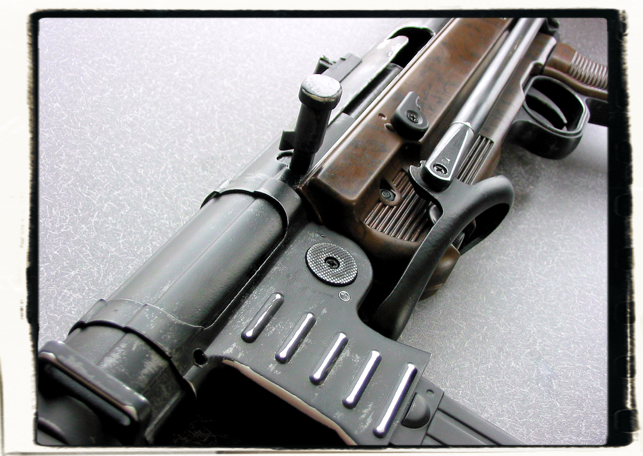
Veteran MP40
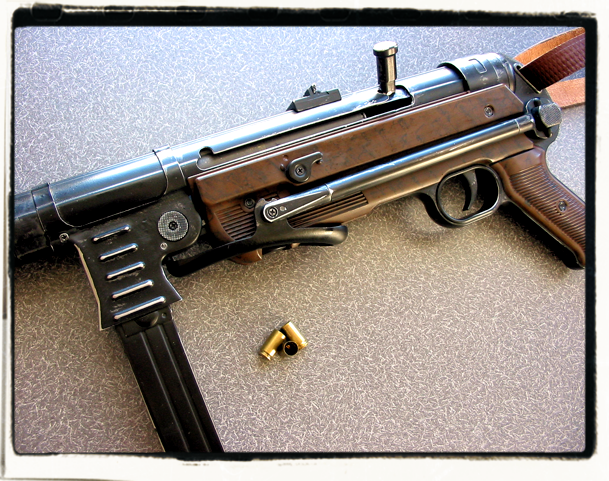
Veteran MP40
Look for Part III - Plastics this weekend!
Slainte!
....Please stay tuned for Part III, "Aging Plastics"
Preview pics-
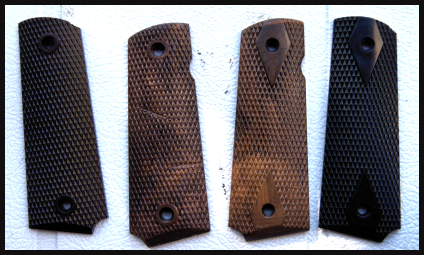
Plastic 1911 grips, standard brown and black set during process...
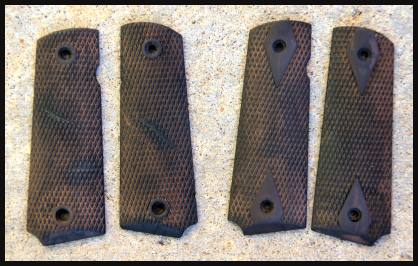
Finished grips
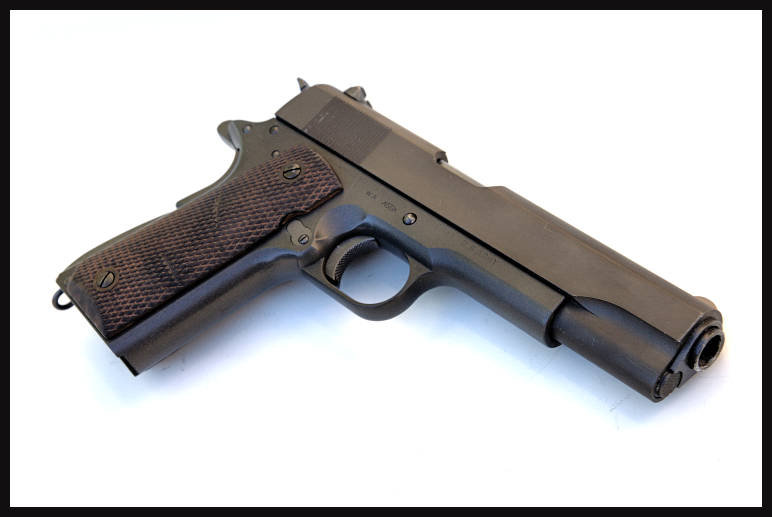
Installed on WA 1911 Military
Slainte!
-G
Feel free to contact me through the forums with any questions or comments!
Slainte!
-G

Lead, Follow, or get the %$@#!! outta the way!!
I'm gonna have to buy two of each gun now!
One to keep nice and shiny, and one to make look like it's actually seen real action!
Good article, cheers.
Wonderful work you've done to these rifles. They're close to my original M1 stock (from 1943).
I keep it nice and darkly stained with boiled lineseed oil. Not sure if that would work on these new rifles, instead of all these acryllic paints I mean.

Join Now!
Right I now know what I'm going to be doing to my M2 this weekend. Nice guide Guinness.
some quality work. an irish french polisher.
lol no seriously i got the bug for airsoft now i might be building my collection up but i gotta try this.
Guinness,
I've already taken the liberty of saving the pages from WWIIAS, these are invaluable along with the information of M14 conversion information, also all the info on other WWII AS custom work from Schmitty,2nd Bat and others
Great work ![]()
Del
No worries! I'm flattered-
...saved them to where? ![]()

Lead, Follow, or get the %$@#!! outta the way!!
No worries! I'm flattered-
...saved them to where?
Local HD for printing ![]()
thanks mate, great tutorial.
i "wear" my guns , by smashing them through windows, chucking them on the ground when they run out of ammo or if i need to use a grenade, and dragging them over concrete , mud , glass and any other shite on a site
thanks for taking the time out to tell us how to do it ![]()
"Take that you rotton helping of strawberry flan!"
Joseph Porta to "strawberrys and cream", in the sven hassel book ,ogpu prison
porta ![]() you are right
you are right ![]()

I could be an a luftwaffe ace you know?..........................................................................Die Unsichtbare Waffe!
Updated with metal aging technique ![]()

Lead, Follow, or get the %$@#!! outta the way!!
I read another way to age stocks on arnies' a while ago too.
All you do is get a perment marker pen (black), draw some the grain on the stock. Then you take some nail polish remover and rub it along the grain you have just drawn on.
Allthough this sounds quite basic it really does have some nice results. Unfortunatly i can't find the page on Arnies' any more (damn disapeering bookmarks ![]() ).
).
EDIT: This is designed for plastic stocks.
after guinness's great article on weathering metal i decided to have a go on my mp40 and although it turned out great i was not happy with the paint so i thought i would try something different. first i got rid of all the paint by sandblasting to take it back to a metal finish,then rubbed all the surfaces with scotchbrite. next i applied two coats of birchwood casy aluminium black which turns it a dark and dull brown in colour.after this just give it a gentle rub down with scotchbrite again andthis is how it turns out.
sorry if the description is a bit vague bt i have just got home and im heavily intosicated,any questions just let me now.
cheers
jayy


I darkend my kar 98 last weekend and gave the metalparts a makeover with some steel woll. Unfortunetly i couldn't get my self to beat up the wood parts. ![]()
My result:
The MP44 also got a treatment on the wood parts. The stuff Shoei puts on fall off the first time you take it out in the field.
Before:
After:
Thanks for the guide Guinness. ![]()
Okay Guinness...your killin' me waiting for the update to this thread! My Thompson really needs the stock aged! ![]()
managed to do a bit more aging, this time on my hfc m712. i have also cut the barrel down to make it more like a 'bolo' version.
jay


looks fantastic Jay ![]()
Jay, Looks fantastic!
You totally need to dremel a red 9 into the grips now though!


Lead, Follow, or get the %$@#!! outta the way!!
Jay, Looks fantastic!
You totally need to dremel a red 9 into the grips now though!
yeah i was thinking that guinness,might wait until i can get some proper wood grips.
iirc the red 9 was the 9mm version,right.


