Hey chaps, while the Lewis gun mag is off for fiber glassing I thought I'd make a start on my MP40.
Now the MP40 caused me grief before I got it. I spent months tracking down a shop with them in stock only to be let down after I paid for it (thanks Boomarms) Then a chap at my local site offered me this beauty with 5 mags and a repro sling for £150.

After much shooting from the hip and posing I cracked out the tools... A short skirmish showed up a lot of design flaws with the AGM system and I was determined to sort all of them and some once and for all!
The work list is as follows
- Strip and clean
New piston and head
New cylinder and Head
Metal bushings
Bearing spring guide
New gears (might as well)
Re shim and lube
AK hop and TM mp5 barrel
TM rubber
H nub
MOSFET trigger system and re wire
Strip the paint and re finish with Birchwood Casey products
Modify bolt with possible RS style safety
Possibly stamp trades[/list:u:t6zqgfaa]
Mechanical

The nozzle is a AK style one that doesn't fit! AGM nozzle is longer by a few mm. Cylinder is just out of shot.
With all my parts here it was time to strip the beast. Oh what a gungy filled mess it was!
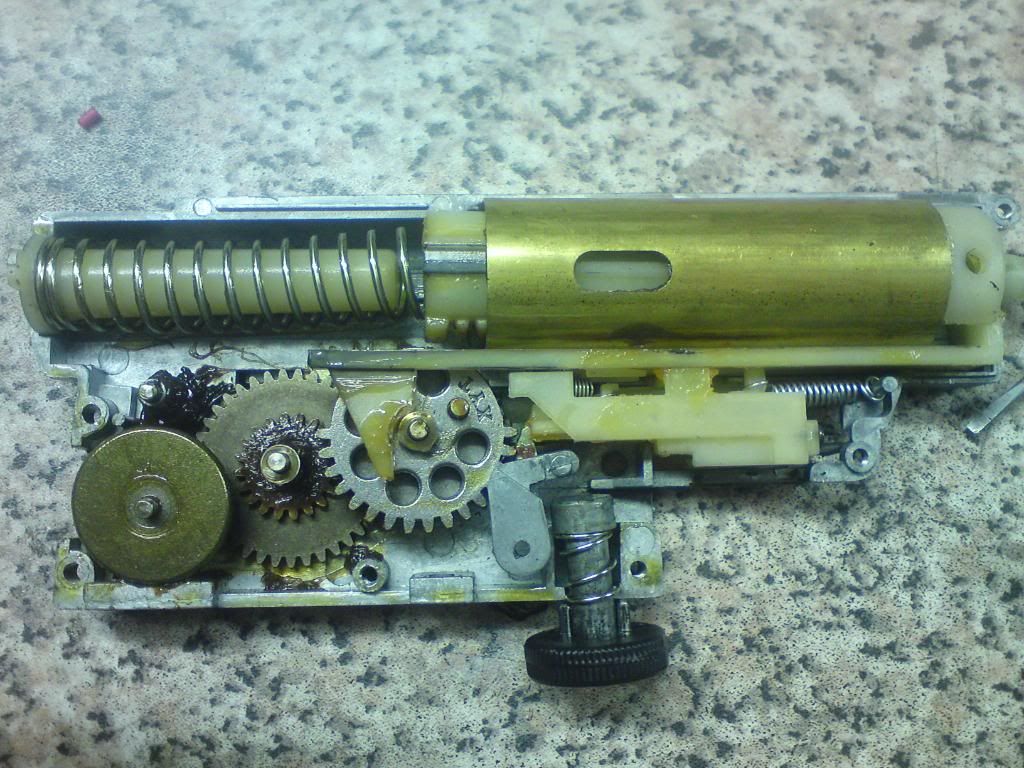
How much goo can you fit in!
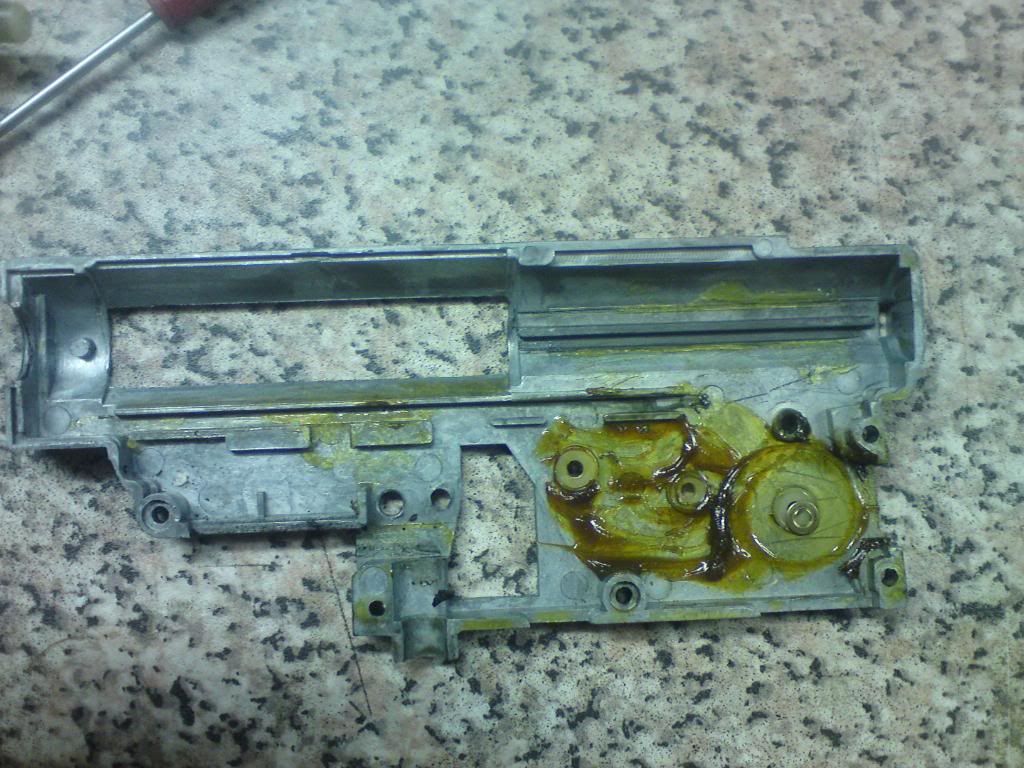
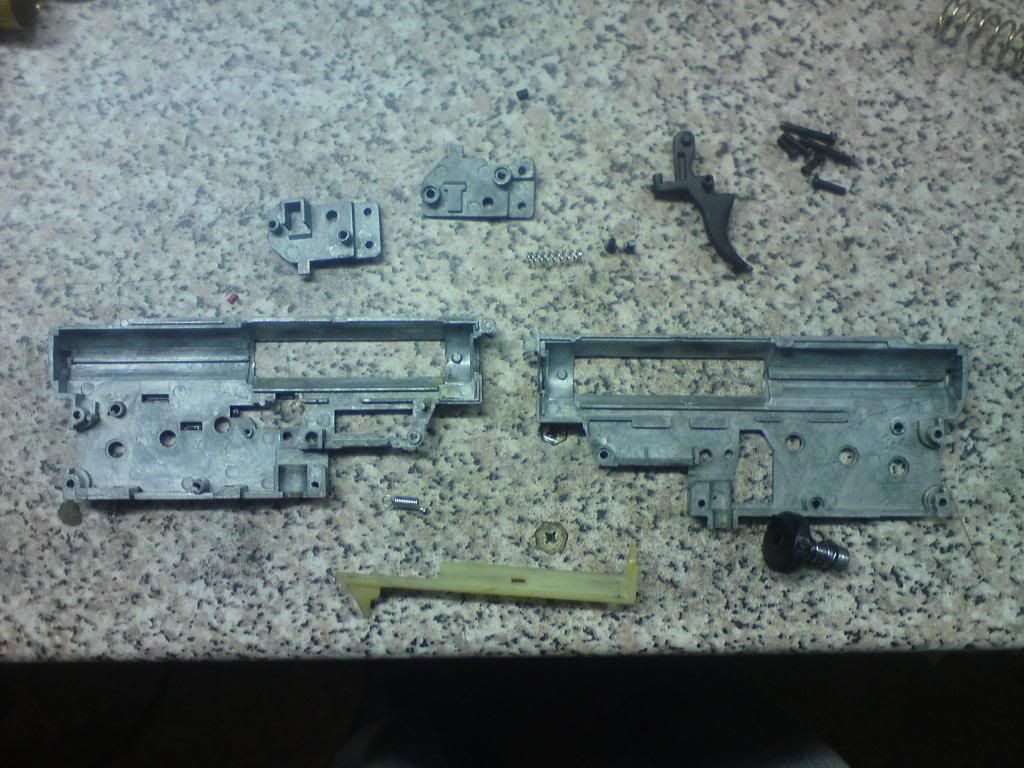
Now I only want full auto so I looked at the trigger system and didn't like it so i binned it in favor of a micro switch/mosfet system.That allowed me to strip out loads of unnecessary parts. Everything below is redundant, No more trigger bar for me!
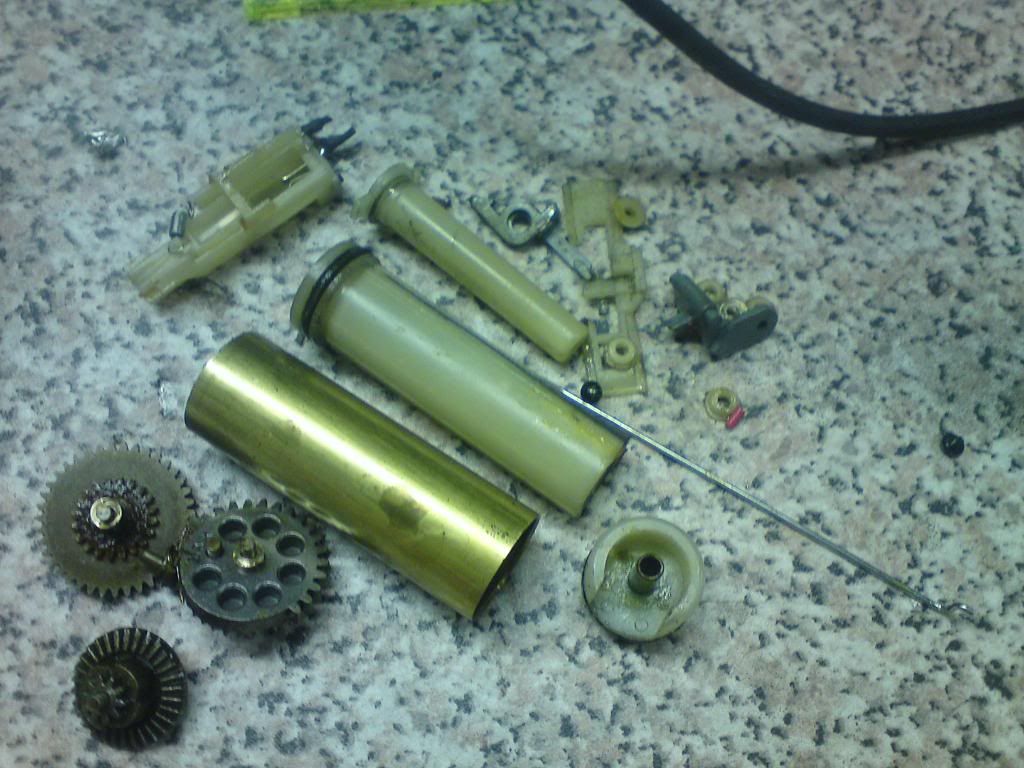
And this is what I kept, found out later i had to re use the stock nozzle.
Sadly I forgot to take a photo of the internals after fitting (doh) and really didn't want to re open it for no reason. Trust me when I say it's pretty ![]()
Electrical
First thing's first I got rid of the stock wiring loom including this abomination (what a pants system)
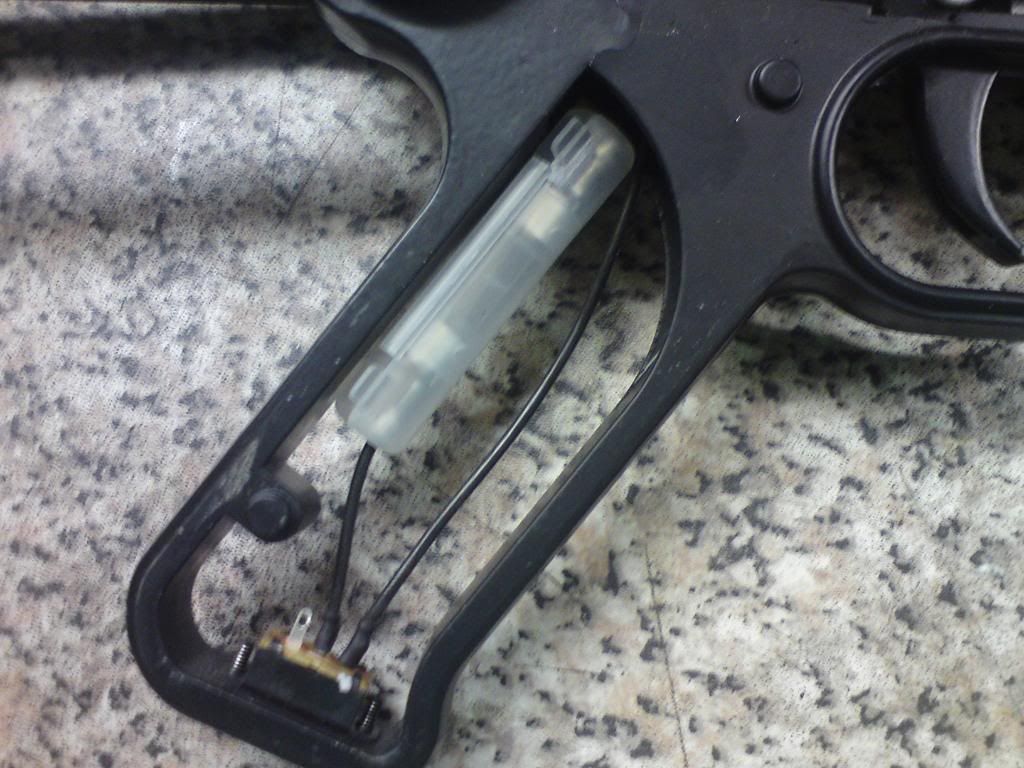
Couple of reference shots for tho's who don't know what the stock set up is
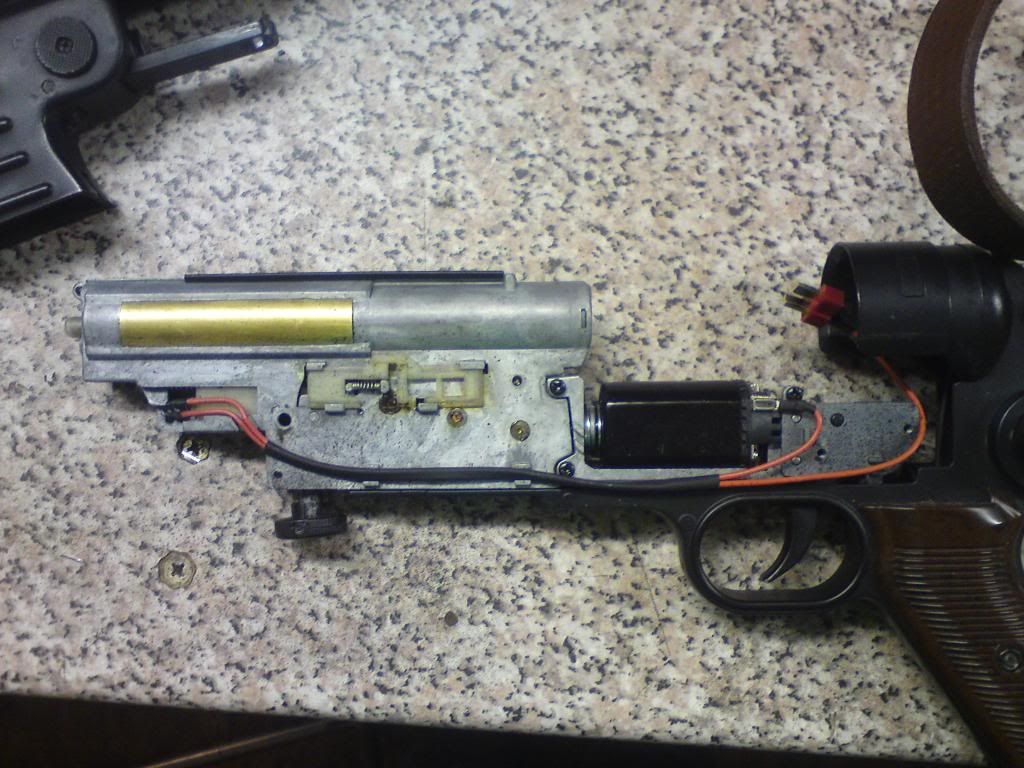
trigger bar

More in post two.....
Needed a way to fit a switch for the Mosfet. So I used an old V3 GB clip and chopped it...
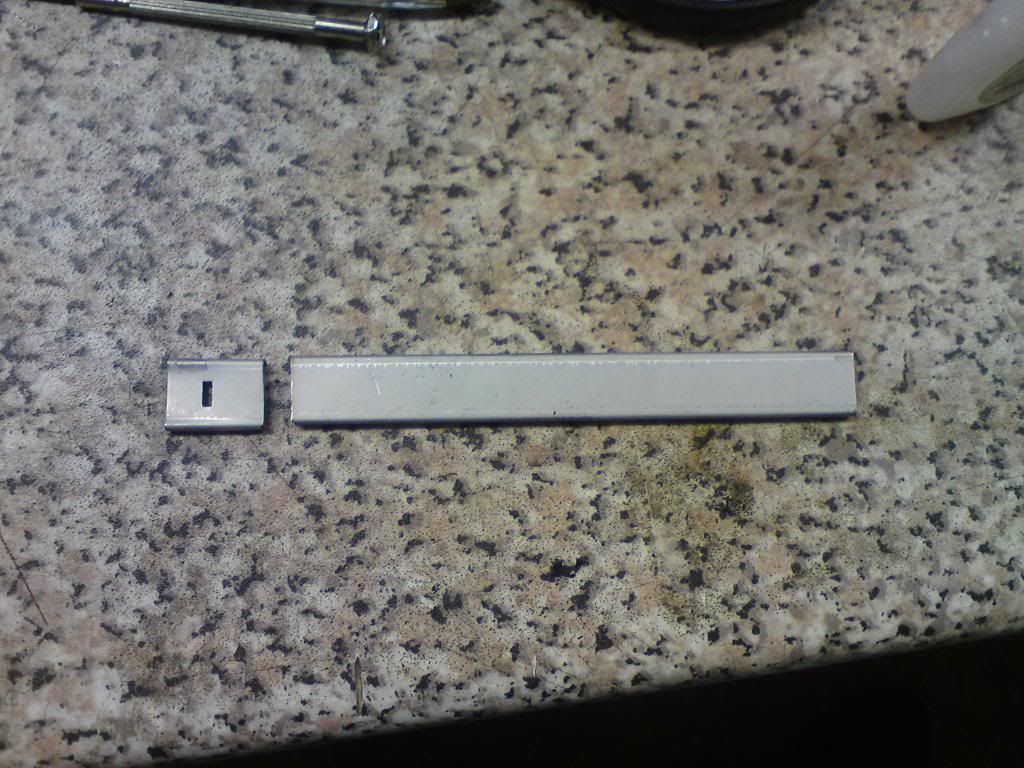
and got a tiny surface mount switch..

And foam backed it to protect against trigger over travel and heavy trigger pulls

Then I put it all together and got this

It took a little packing and adjusting to get it sitting properly, but now it sits nicely and works very well. Now a little switch like that would melt if I used it as the trigger on its own. So I rustled up a non breaking Mosfet (IRL1404z) and wired it in with lovely 12awg silver flex and a gold plated deans connector. Bling bling ![]()

Short wires means lower resistance, soldering all connections helps too! I'm aiming for maximum efficiency.

My 7.4 lipo fits just perfectly in the battery space and gives a nice low is ROF (~850rpm) I want eventually to get closer to 600 as this project is all about paying homage to the RS MP40

Just an overview pic so you can see the layout. Mosfet sits in the top part of the pistol grip.

That's all for tonight. I'll be doing the hop and externals tomorrow so expect lots of photo's!
Suggestions and comments welcome, If you've got any pics of the AK hop mod that would be a big help ![]()
Ta
Dave
EDIT: Photobucket is having a bad day and the last few pics are inverted sorry for that
Did you dump the stock XYT gears and replace them with others? If so, just wondering why. XYT steel gears are actually pretty damn strong when used around the 350 FPS mark, problems only start occuring when you're using silly springs...


When we were a Kingdom it was run by a King
When we were an Empire it was run by an Empress
Now we're a country we're run by a..........
That's quite the overhaul mate. You should go work for discovery channel. ![]()
Looking forward to the next batch of pics.
Looks good. Not often you get to see inside the MP40's. Will be a handy guide if (when) I ever get one.
Amazing work on the electronic trigger! ![]() Just a suggestion though, I think you should retain the plastic cylinder head or if you really want to replace it, use a plastic, not brass/aluinum/steel, cylinder head. The AGM MP40 gearboxes are mostly old stock (hasn't been in production for a while) and can be brittle. The metal cylinder head slamming against the gearbox might result in a greater risk of breakage. I've had three mp40 gearboxes crack on me and the common denominator was metal cylinder heads. You may also want to further protect the gearbox by installing a sorbo pad and corner cutting the edges of the cylinder window. I hope you can post pics of how you custom fit the AK hop chamber.
Just a suggestion though, I think you should retain the plastic cylinder head or if you really want to replace it, use a plastic, not brass/aluinum/steel, cylinder head. The AGM MP40 gearboxes are mostly old stock (hasn't been in production for a while) and can be brittle. The metal cylinder head slamming against the gearbox might result in a greater risk of breakage. I've had three mp40 gearboxes crack on me and the common denominator was metal cylinder heads. You may also want to further protect the gearbox by installing a sorbo pad and corner cutting the edges of the cylinder window. I hope you can post pics of how you custom fit the AK hop chamber. ![]() Cheers!
Cheers!
I bought a full tune kit and it was simpler to replace the gears than scrub em clean!
Ta
Dave
Amazing work on the electronic trigger!
Just a suggestion though, I think you should retain the plastic cylinder head or if you really want to replace it, use a plastic, not brass/aluinum/steel, cylinder head. The AGM MP40 gearboxes are mostly old stock (hasn't been in production for a while) and can be brittle. The metal cylinder head slamming against the gearbox might result in a greater risk of breakage. I've had three mp40 gearboxes crack on me and the common denominator was metal cylinder heads. You may also want to further protect the gearbox by installing a sorbo pad and corner cutting the edges of the cylinder window. I hope you can post pics of how you custom fit the AK hop chamber.
Cheers!
Hmmm Thanks for the praise and the heads up. I'll radius it tomorrow. As for the cylinder head I've installed a silent head as well so that should help with impact. update i next post ![]()
Update
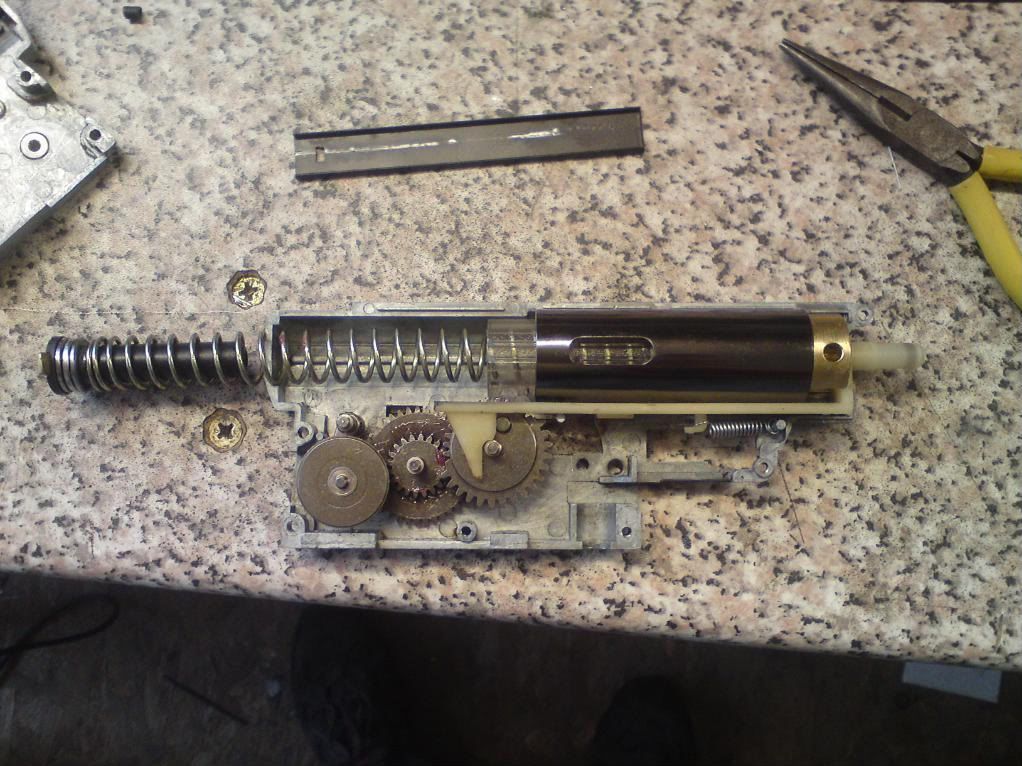
First up a quick look at the revised internals, Opened it up again to change it over to a silent piston head.
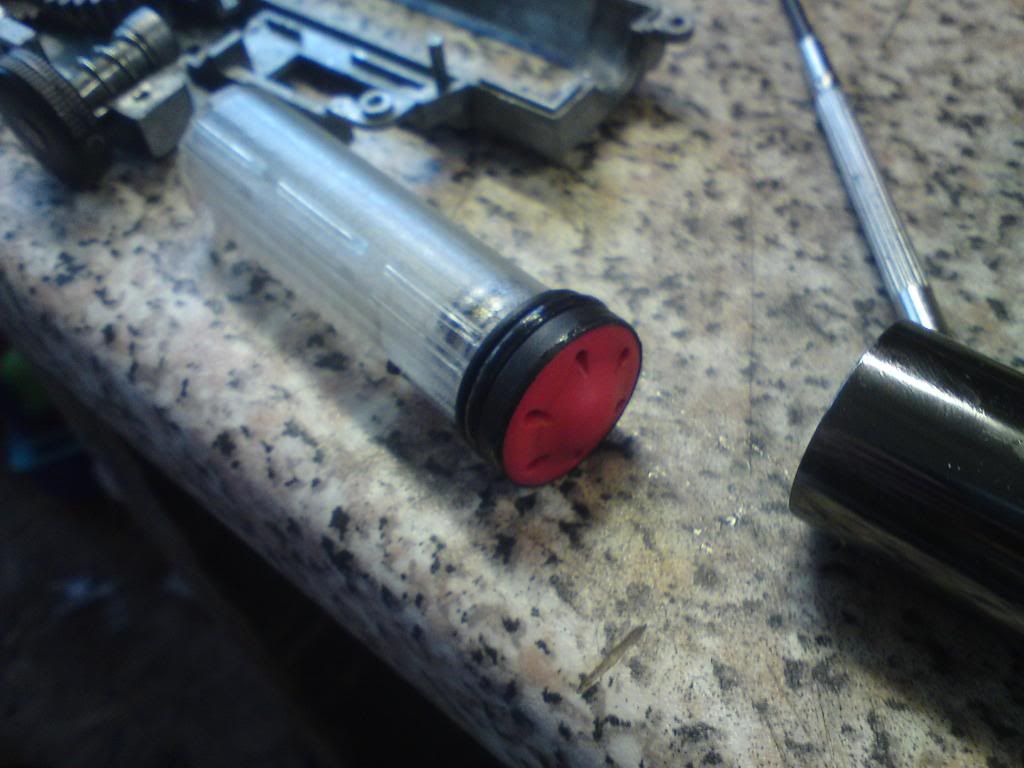
Internals, so much more room now!
Then came the real work! Stripping finest Chinese paint to get down to the bare metal. SO much hassle
NITROMORES FTW! Was doing a mates AKMS at the same time
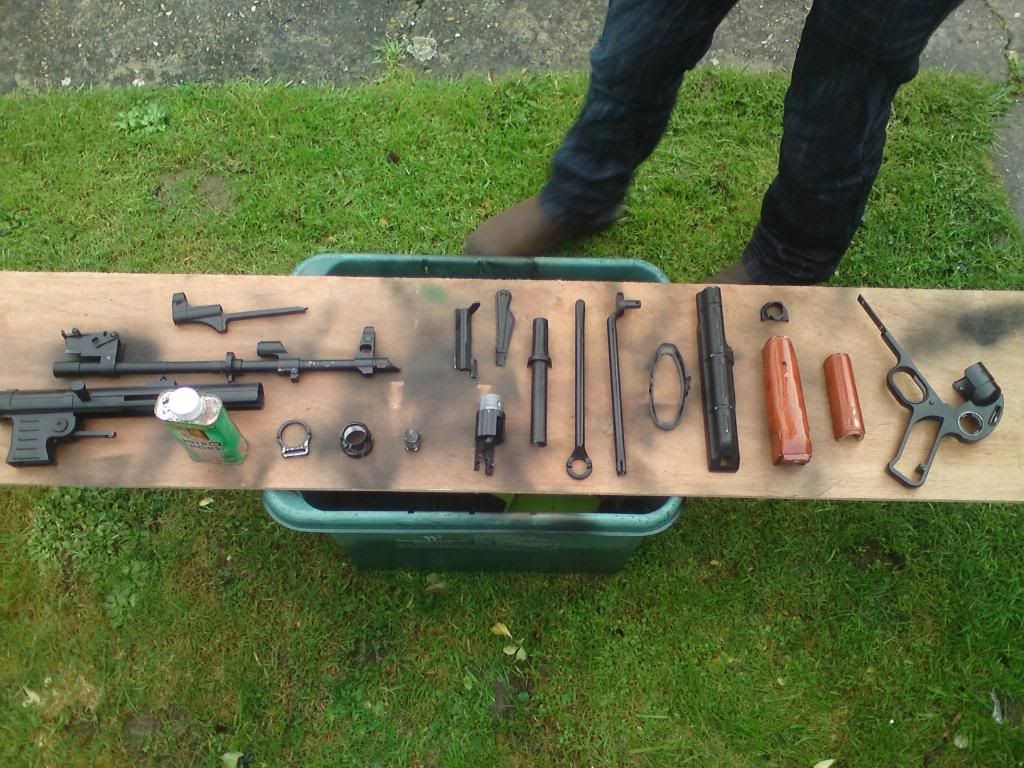
Results
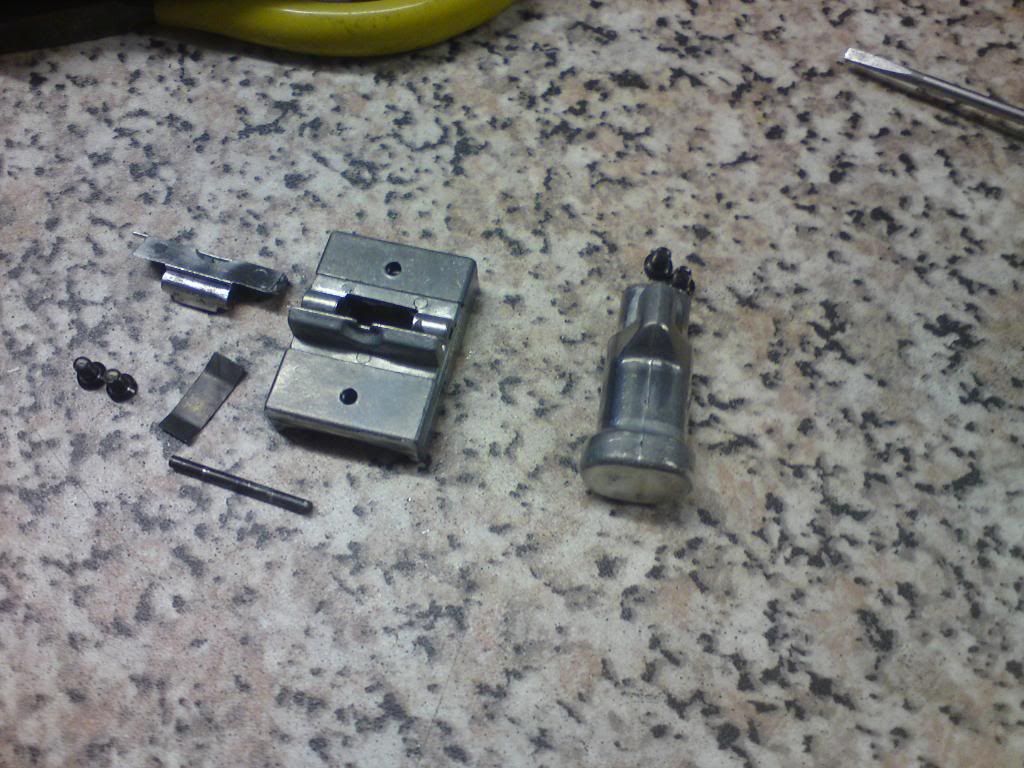
The steel wouldn't give up its paint so I had to wire wheel it.
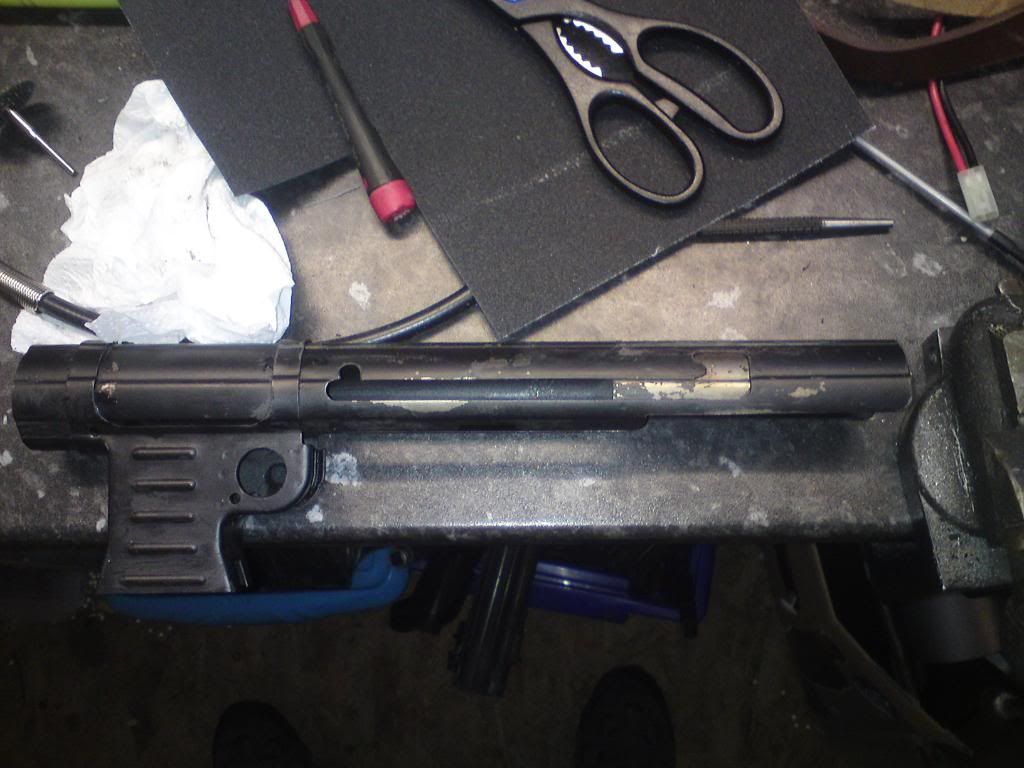
Wanted a full bolt so cracked out the Dremel and got grinding (took two cutting wheels and 3 stones)
Results
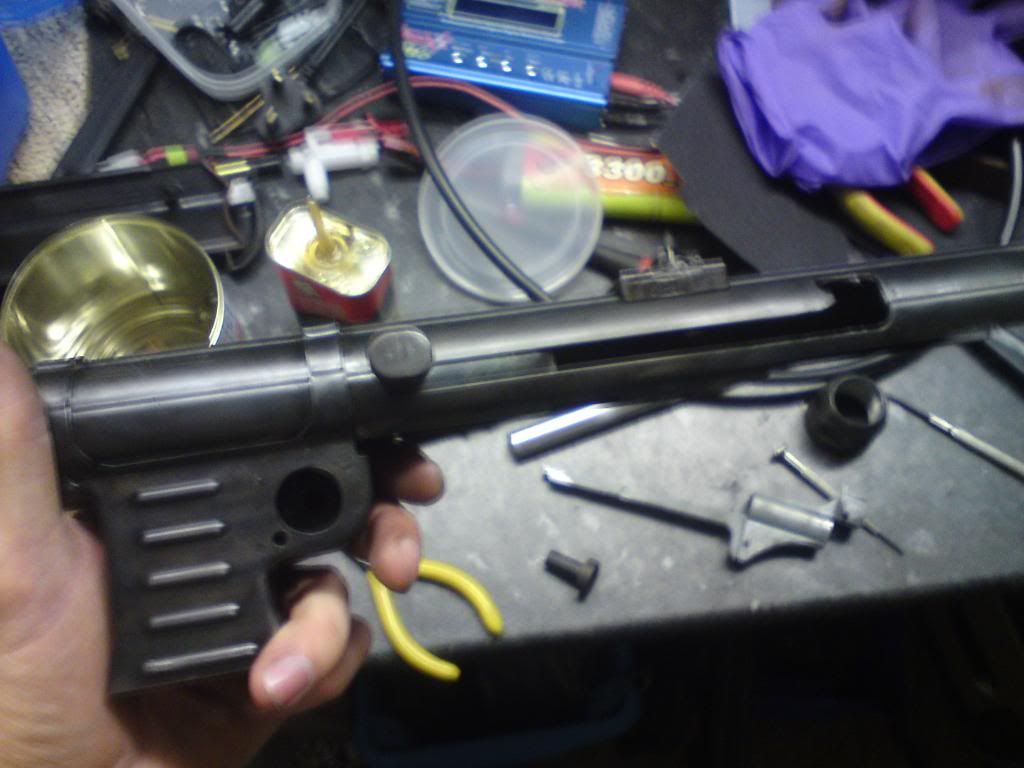
Then I cracked out the cold blue Before (left) and after (right)
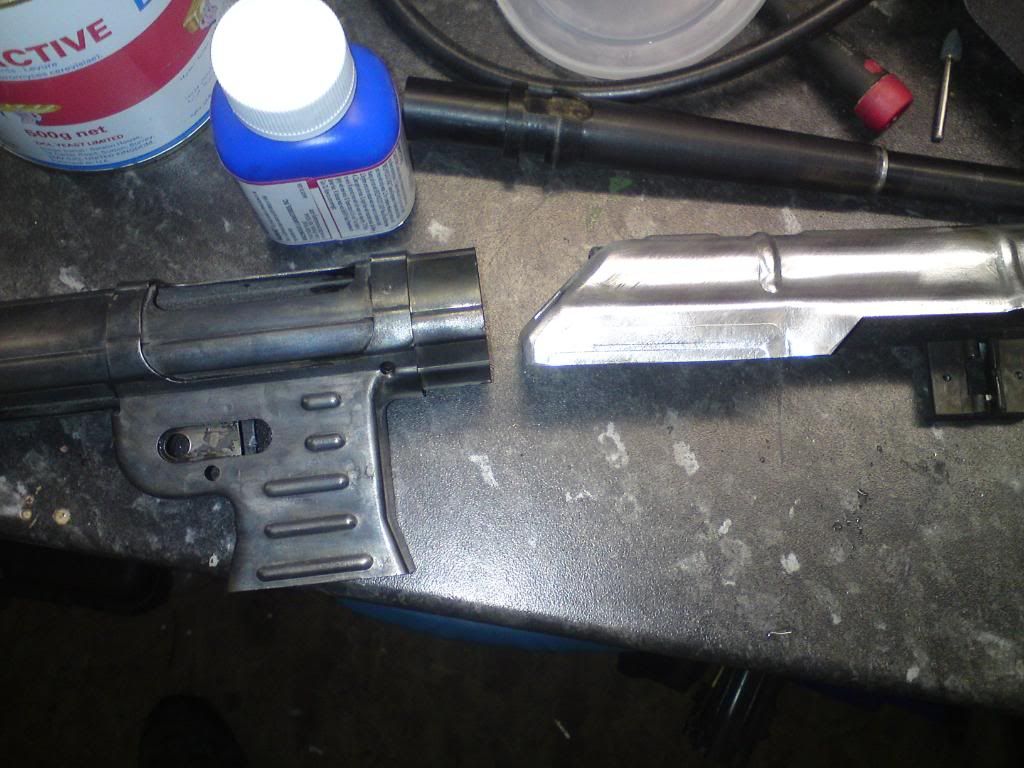
Didn't want a perfect blue as I wanted an antique/work horse look. so i applied it quite slap dash ![]()
Then did the Ali parts with aluminum black
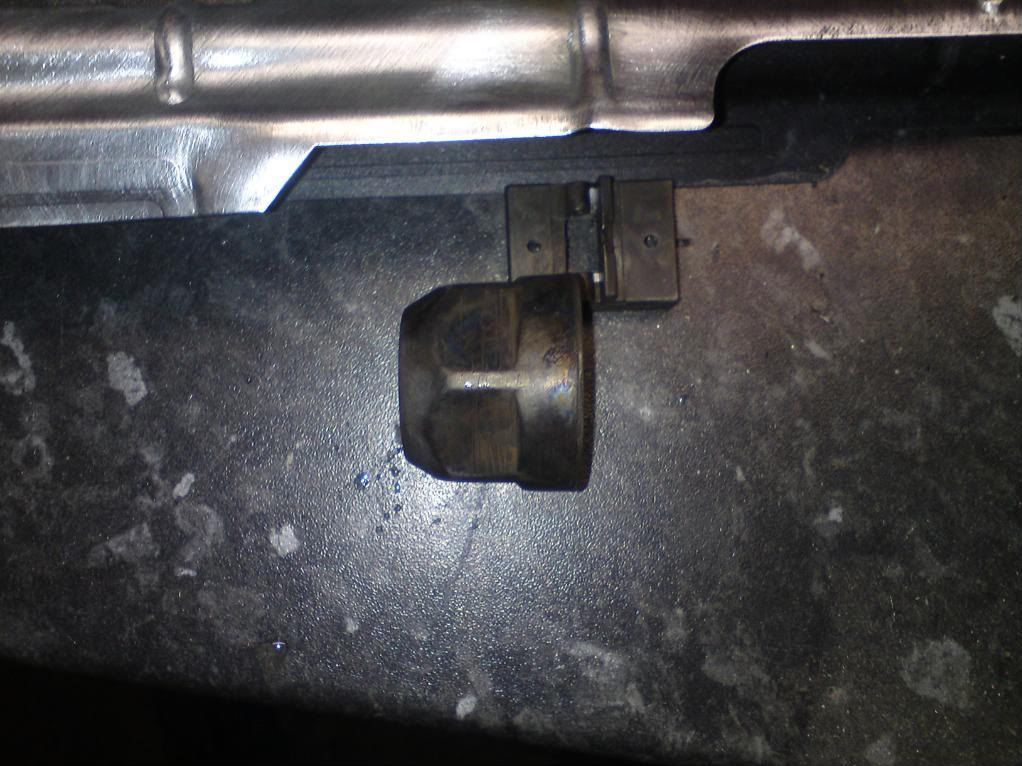
Then it was just a case of oil and assemble
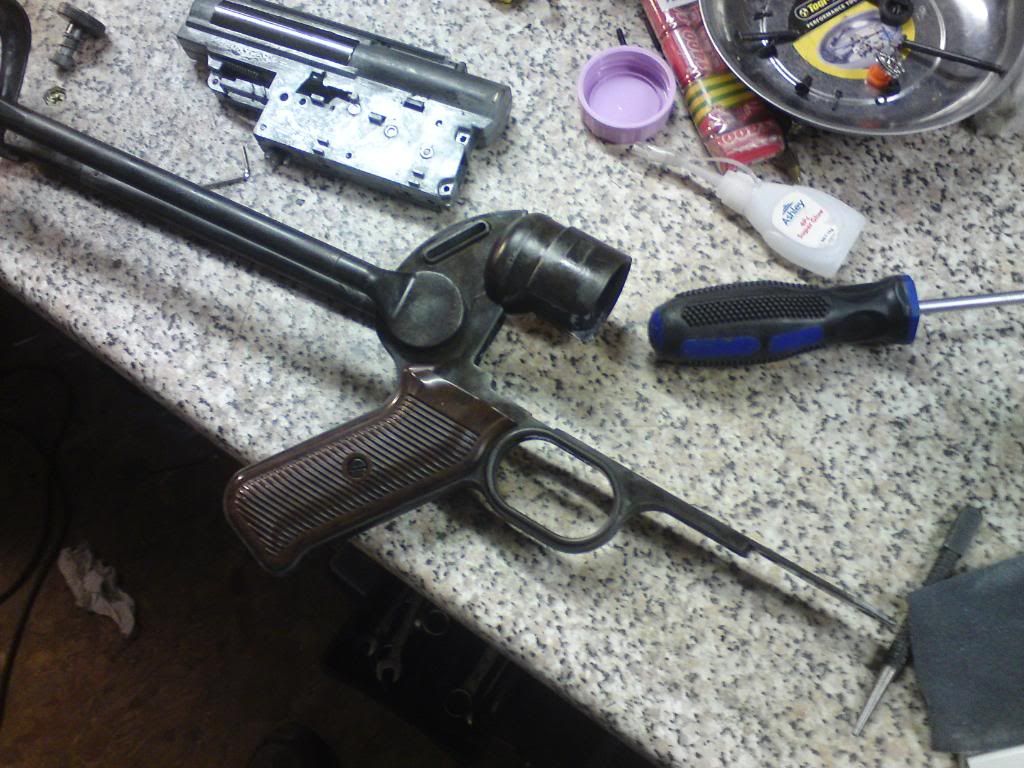
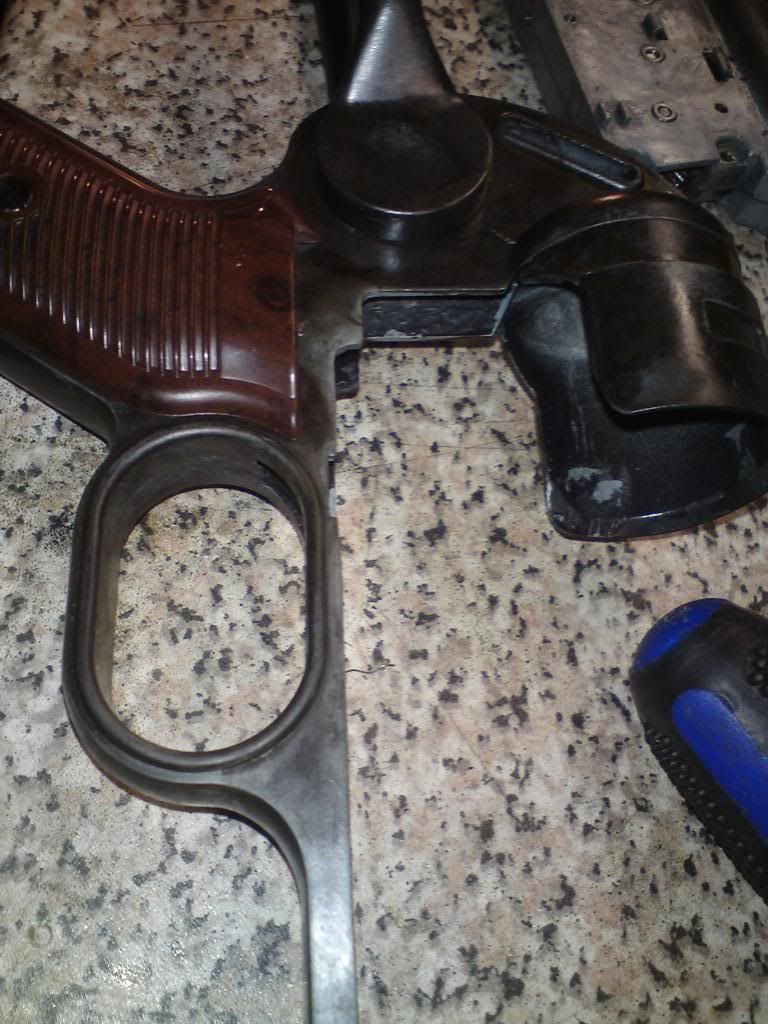
More in a mo
And here she is as she stands. Still need to do the hop and barrel and fill selector hole. Maybe add trades too ![]()
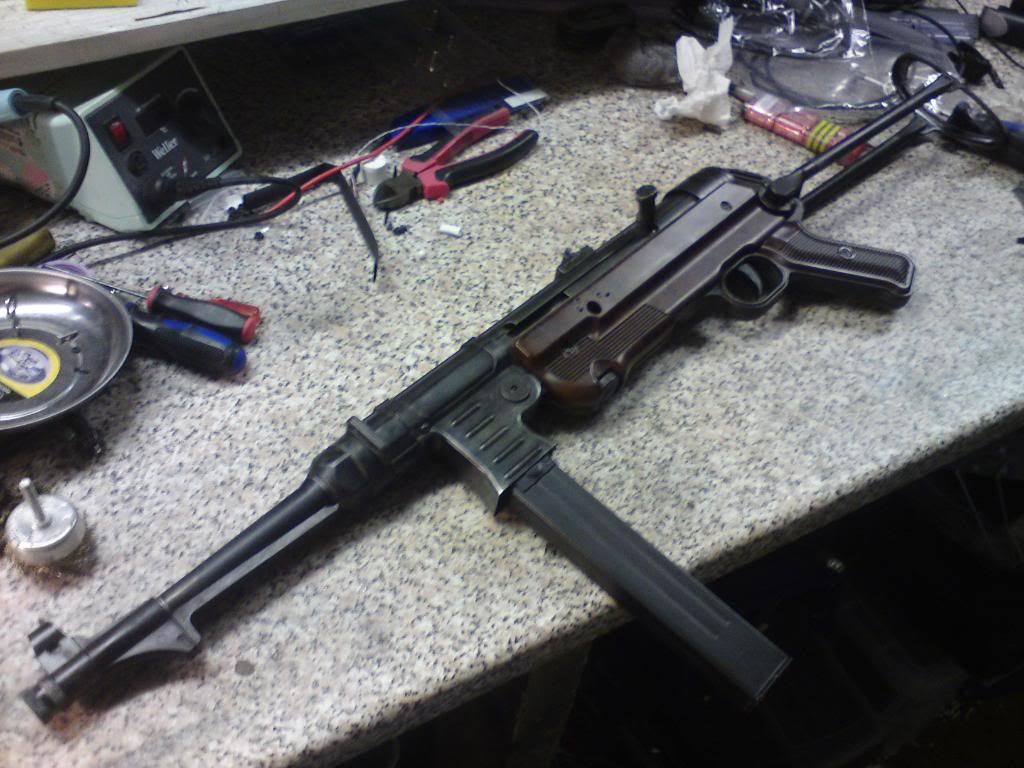
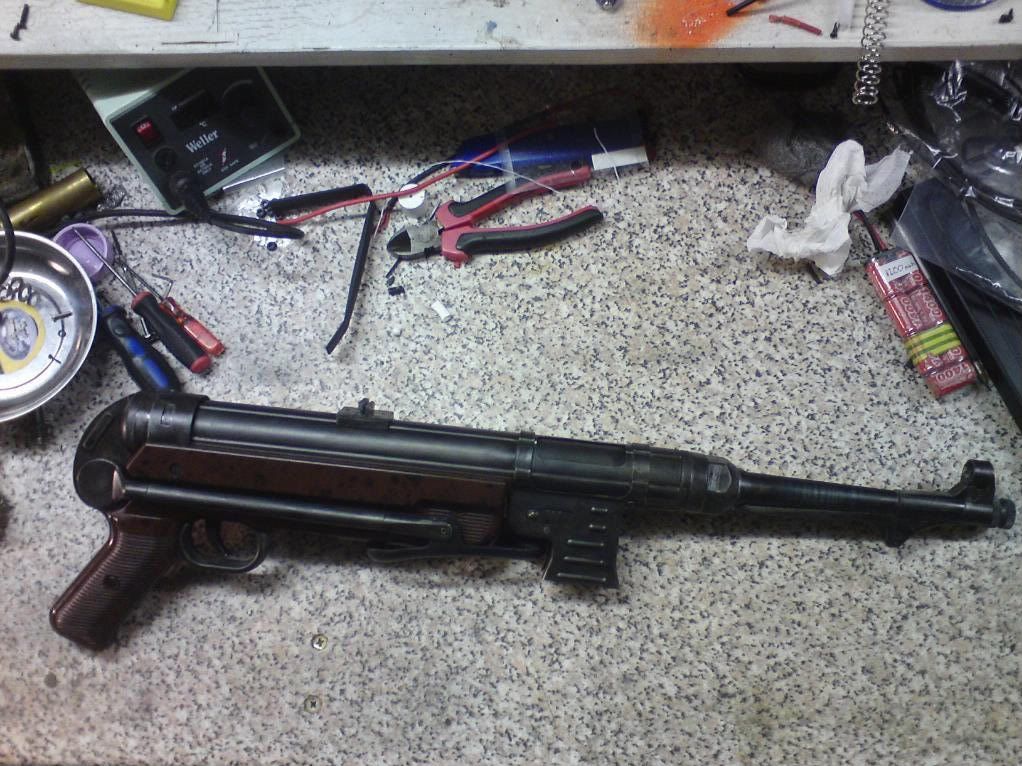
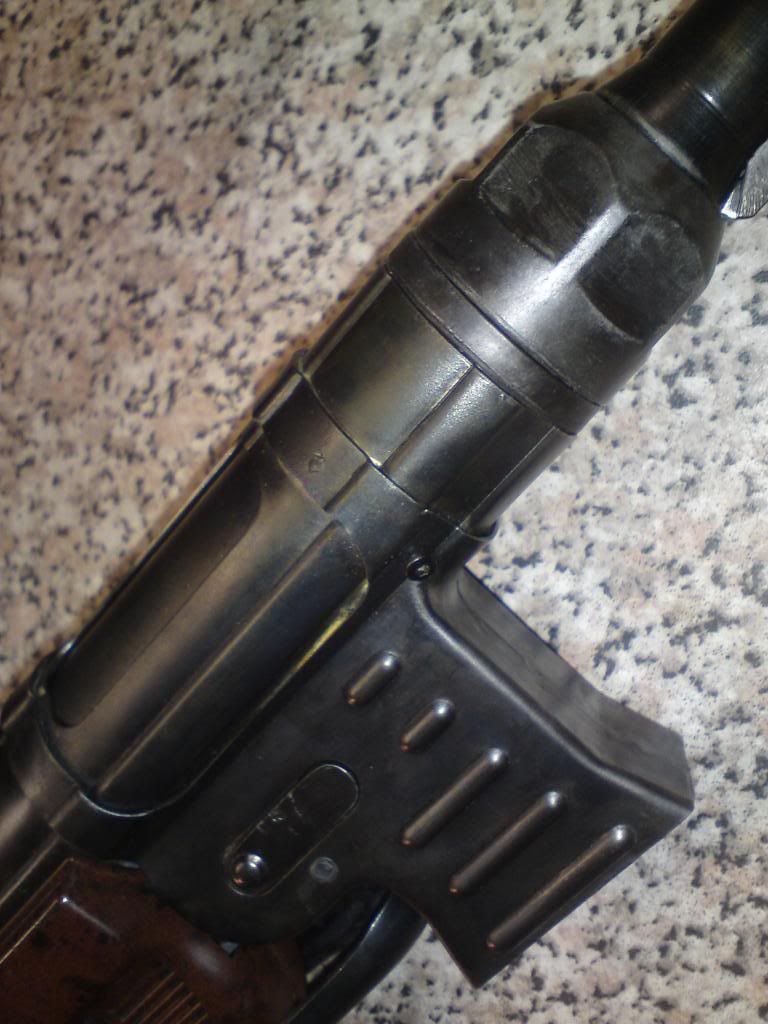
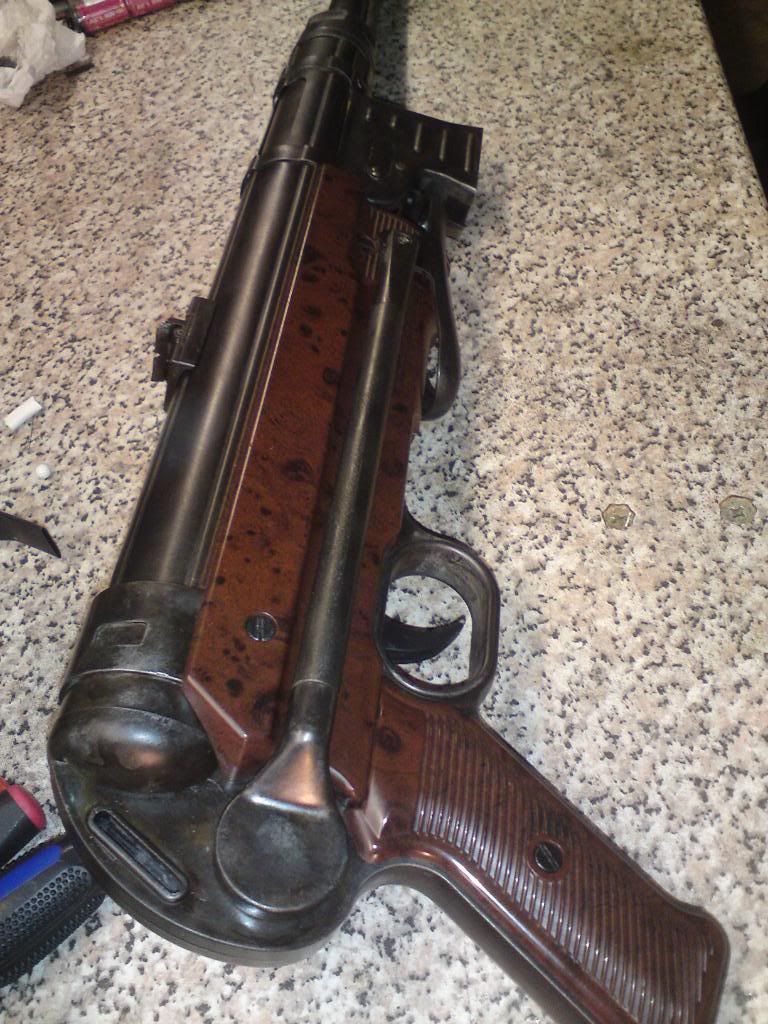
Comments welcome
That's all for today I'm shattered!
Ta
Dave
looks great mate well done. 


 very nice,
tempted to do my mp40 now ![]() already have a bottle of cold blue coming to do my mp44 when it arrives ,
already have a bottle of cold blue coming to do my mp44 when it arrives ,
what do you mean by aluminium black??
:good: very nice,
tempted to do my mp40 now
already have a bottle of cold blue coming to do my mp44 when it arrives ,
what do you mean by aluminium black??
Caseys Aluminium black is a blacking fluid which turns Aluminium black. (does what it says on the tin) they do quite a few varities one for real steel etc. Didnt realise the MP40 was made out of Aluminium.


I'd be inclined to keep the "safety switch" operational - but changed to the trigger circuit, rather than the battery supply.
Could you give more detail of the mechanics of the trigger? I don't see from the photos how the trigger presses the button.
The finish looks great.
I dont think I would have bothered with all the gearbox upgrades though. Wack an M90 or M100 spring, clean the gearbox, put in an AK hop unit and a tighter barrel and thats as good as you'll get the AGM to fire IMHO.
I just use cheap batteries in mines to simluate a lower ROF and it works nicely.
:good: very nice,
tempted to do my mp40 now
already have a bottle of cold blue coming to do my mp44 when it arrives ,
what do you mean by aluminium black??
The AGM MP44 is mostly aluminium alloy mate so you'll need a bottle of Aluminium Black. The only steel parts on the AGM MP44 are the heat shield, front sight hood and the stock corner plates.
The gas tube on it is copper. I would leave the Gas tube with the original black paint on it as the only way to darken the copper is to use Birchwood Casey's Brass Black, or patina it with Liver of Sulphur from an Art shop. If you do that you will need to lacquer the gas tube once finished because you only have to look at the finish and it comes off!!
Anyway back to MP40 - it looks ace, very tempted to do mines now as I have a healthy stock of BC gun finishing products. Did you remove the annodized finish from the barrel?
AGM MP40 - AGM STG44 - CYMA Thompson M1A1 - WE P08 4 inch - Marushin M1 Carbine GBB - AGM Sten MkII
Thanks for the comments guys ![]() I'll try to explain my methods....
I'll try to explain my methods....
Internals. I'm the airsoft tech for Spec Ops Dorset so I approached this as a "look what I can do" gun. The internals are all Element and came in the form of an full tune kit and silent cylinder set that cost me around £22! I've installed countless element parts and found them to reliable and well made, just what I wanted for my mp40. The firing is now noticeably smother with a more punchy "feel" FPS has jumped from 308fps to 339fps. As for down range performance I've got a few tricks to maximize effective range ![]() but at the end of the day I don't play period airsoft to "pwn" everyone I do it for the feel. Hence I'll shoot mainly from the hip whilst shouting french obscenities
but at the end of the day I don't play period airsoft to "pwn" everyone I do it for the feel. Hence I'll shoot mainly from the hip whilst shouting french obscenities 
The improved trigger system has massively improved the reliability or my gun. I never used to get more than a few shots in semi before sticking and it twice got stuck on full auto! Not now ![]()
The micro switch is pressed by the tab at the back of the trigger where the return spring is.
FYI the mp40 is alloy (use ali black) apart from the upper receiver, bolt cover, mag well and foresight hood (steel) barrel and the stock arms (pure ali) When blacking the arms sand them liberally to remove the clear anodize and warm with a heat gun to aid the chemical reaction. You'll need to apply a lot of chemical to get this part to black. with the barrel just give it a good rub with wire wool to distress and you CAN then lightly go over it with a brass dremel brush. That gives it a goldie brown tinge. Apply ali black after brushing
After treating give the gun a good wipe with gun oil and buff with paper towel.
Hope this helps ![]()
Dave
Lovely looking gun mate!
If you want to sort out the plastic and get that genuine 1940's bakelite look, check out a user call Guinness on Arnies and the US ww2 forum. He has a neat technique that looks great.
Now I am regretting selling my MP40 as well!


Lovely looking gun mate!
If you want to sort out the plastic and get that genuine 1940's bakelite look, check out a user call Guinness on Arnies and the US ww2 forum. He has a neat technique that looks great.
Now I am regretting selling my MP40 as well!
do you have any links? Arnies is a big forum! ![]()
THE HOP UP MOD - I know it's a big thing with this gun.
Firstly for this you'll need the following (Assuming you've removed the unit from the gun)...
- fine tooth hand saw
Small round file or sandpaper wrapped around a dowel
Hammer
PTFE Tape
MP5 length barrel
Hop rubber
H nub (optional)
Cuppa tea[/list:u:2f4u4tlh]
Firstly remove the hop slider, hop arm and barrel spacer and put in a safe place.
Then make a radial cut here
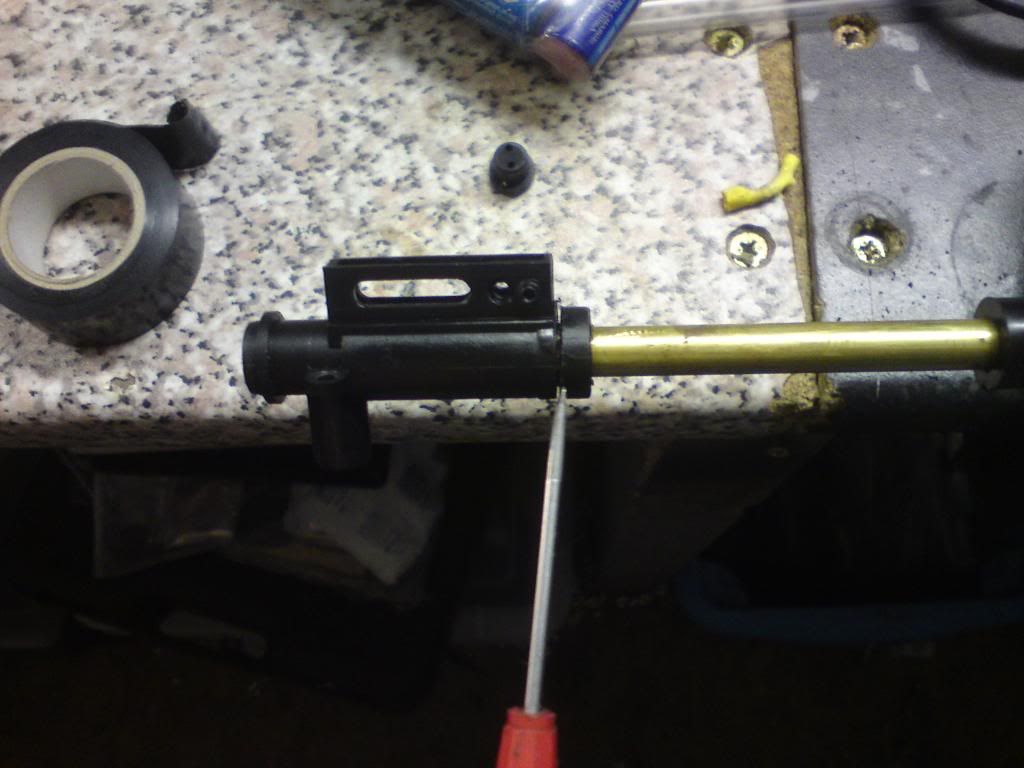
this part of the hop unit should come loose now (i've left the collar on here. It's better to remove it first)
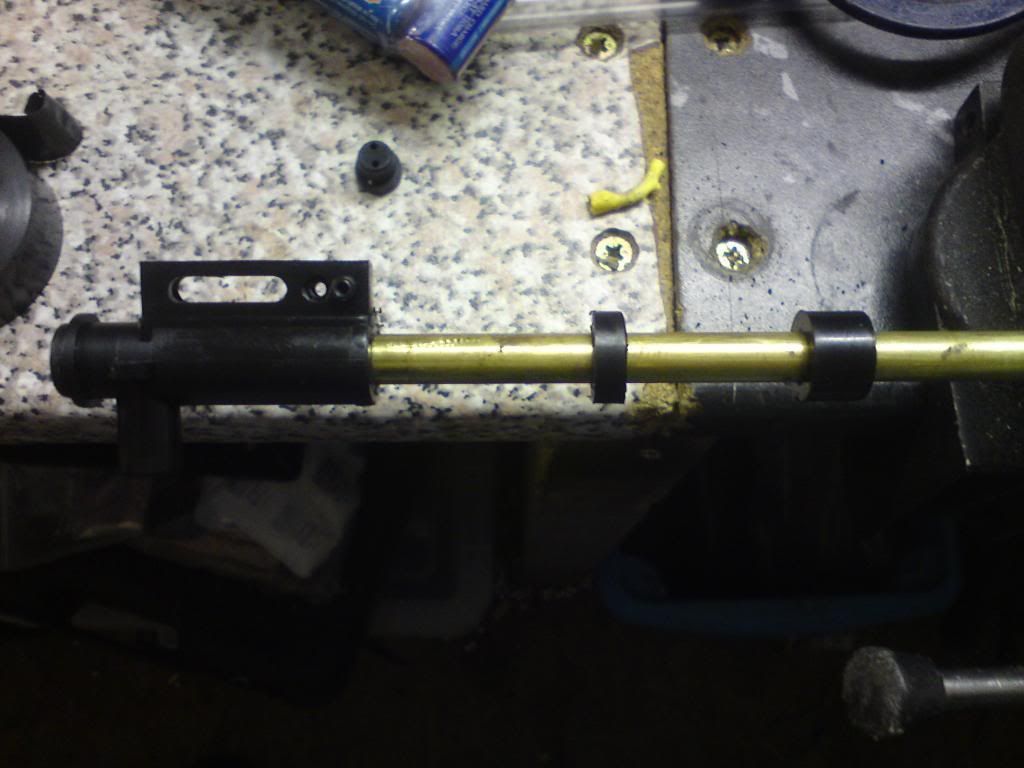
Now you need to GENTLY persuade the hop unit off the the end of the barrel 
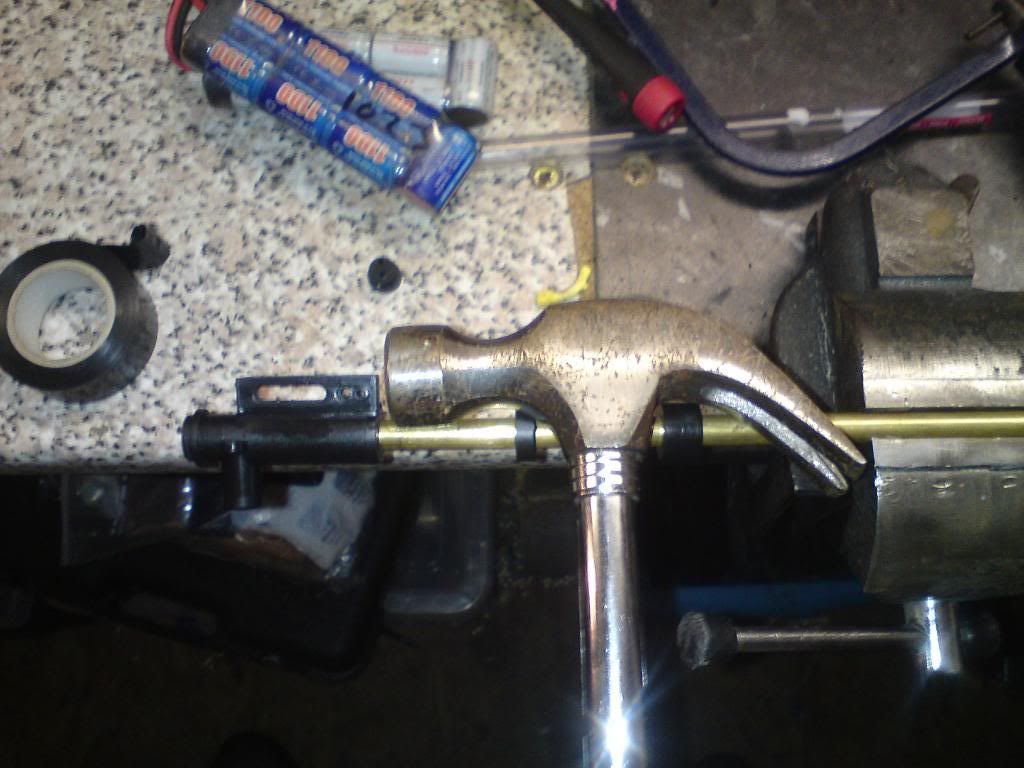
After tapping off the hop you'll be greeted with this. You'll need to find the c clip that's been glued in and remove it with a small bladed screwdriver.
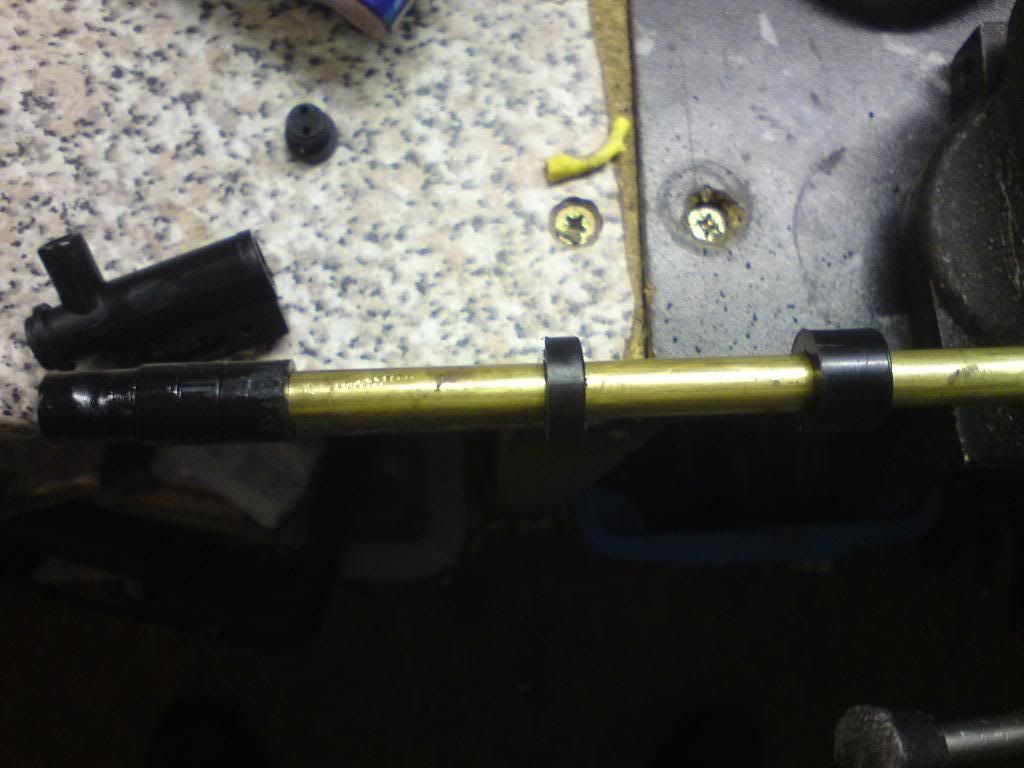
Here it is with the c clip and rubber removed
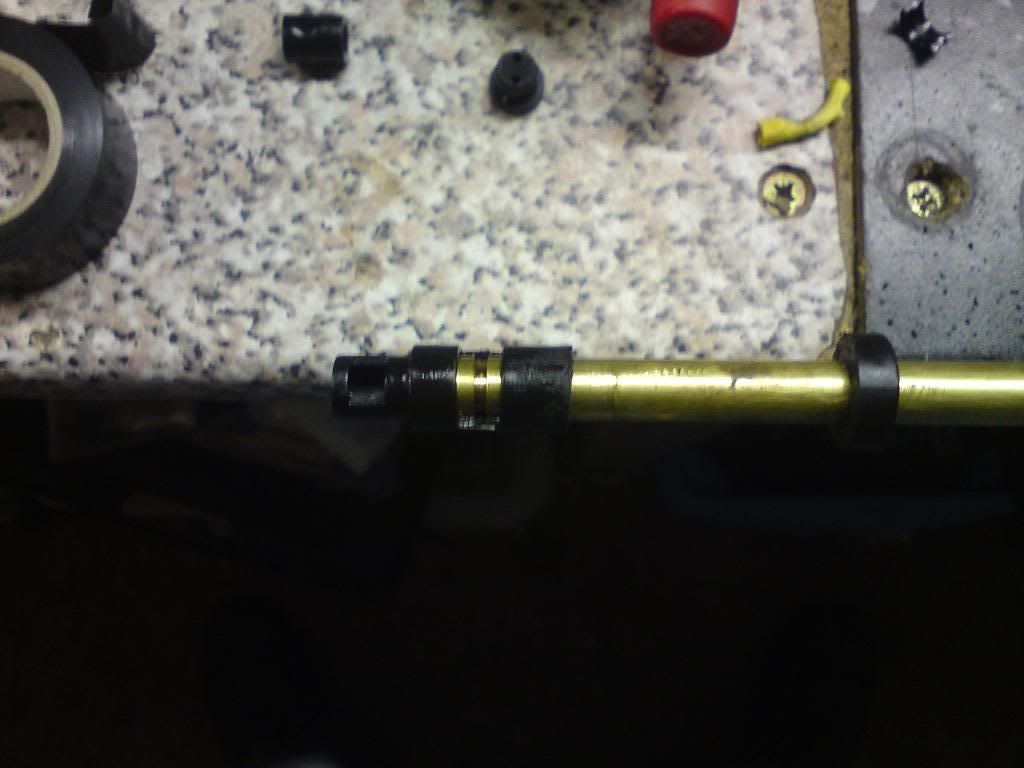
Right. now you need to cut down this bit of plastic on the end off the barrel. You're gonna use this as a spacer for the new barrel. see below
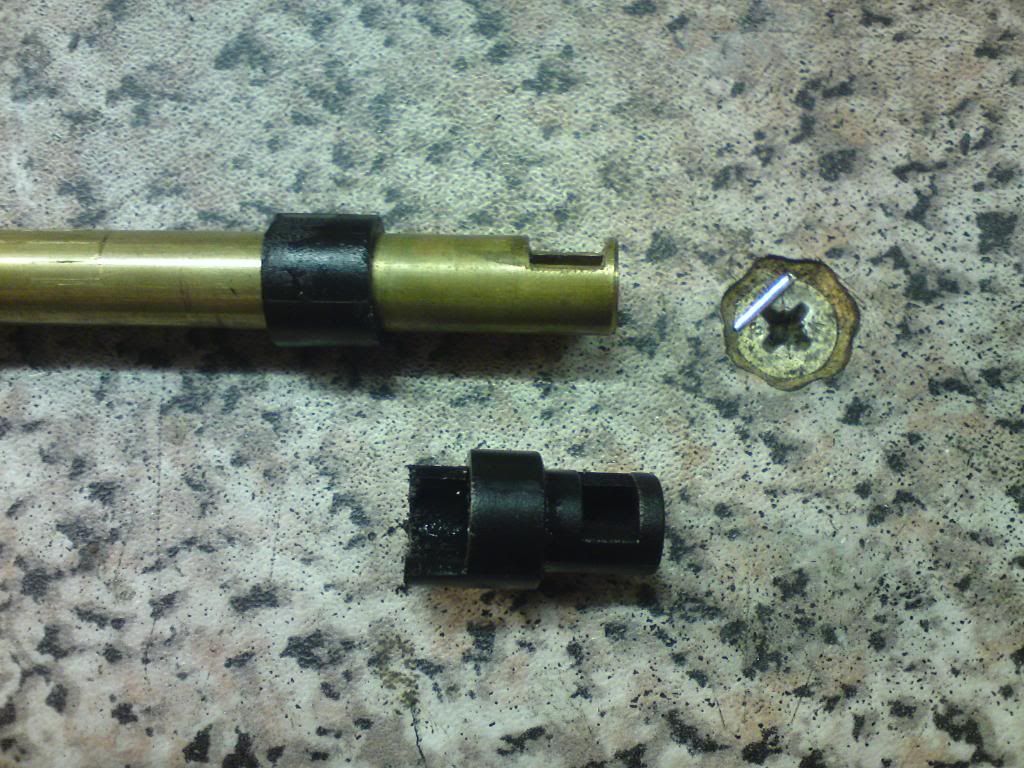
Now on my tm barrel it was a tight bugger and needed filing. This build relies on friction to hold it together so be careful taking out too much material. (you can always use glue if you mess up) Make sure the groove in the underside of the barrel lines up with the grove in your spacer (you'll see it)
Now pop your choice of hop rubber on. I like to give it a damn good wrap in PTFE for a bit more air seal
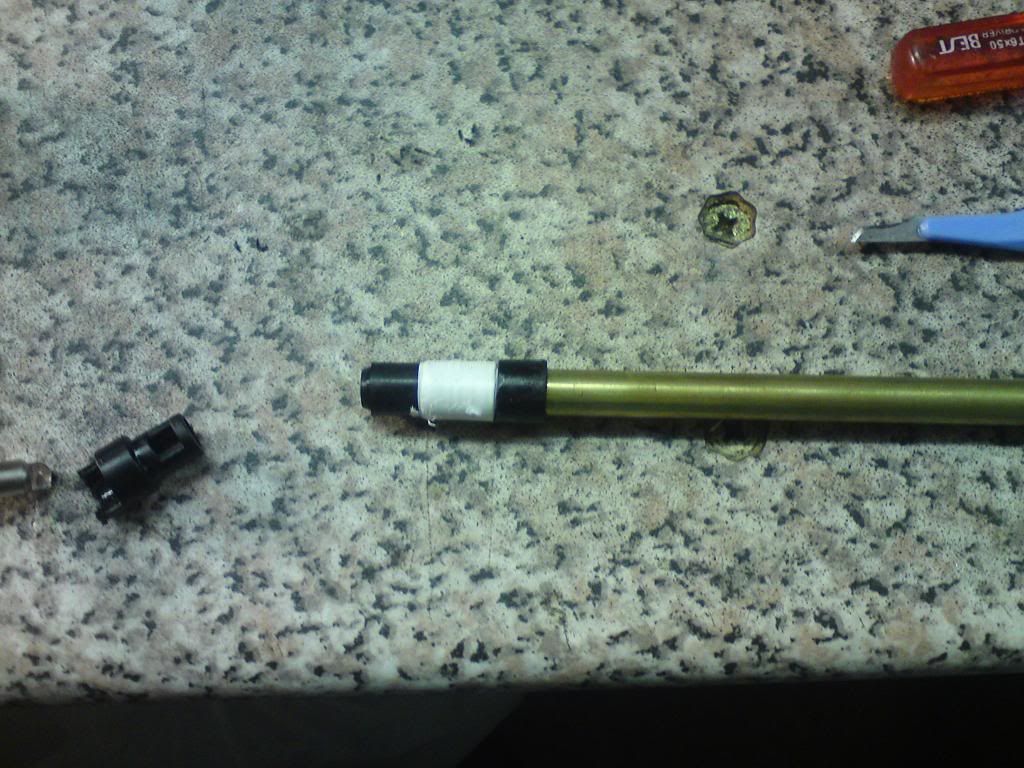
Now you need to carefully re assemble the unit by sliding the barrel with collar into you unit (oo er missus) check that the lip of the hop rubber doesn't protrude to far into the feed part of the chamber. best way to do this is shine a light in the nozzle opening and look down the feed tube.
Put the front of the hop unit back on and the barrel collar too. Re assemble the hop arm too. I found that the cut out for the nub was poorly made so I filed off the flash before fitting a H nub.
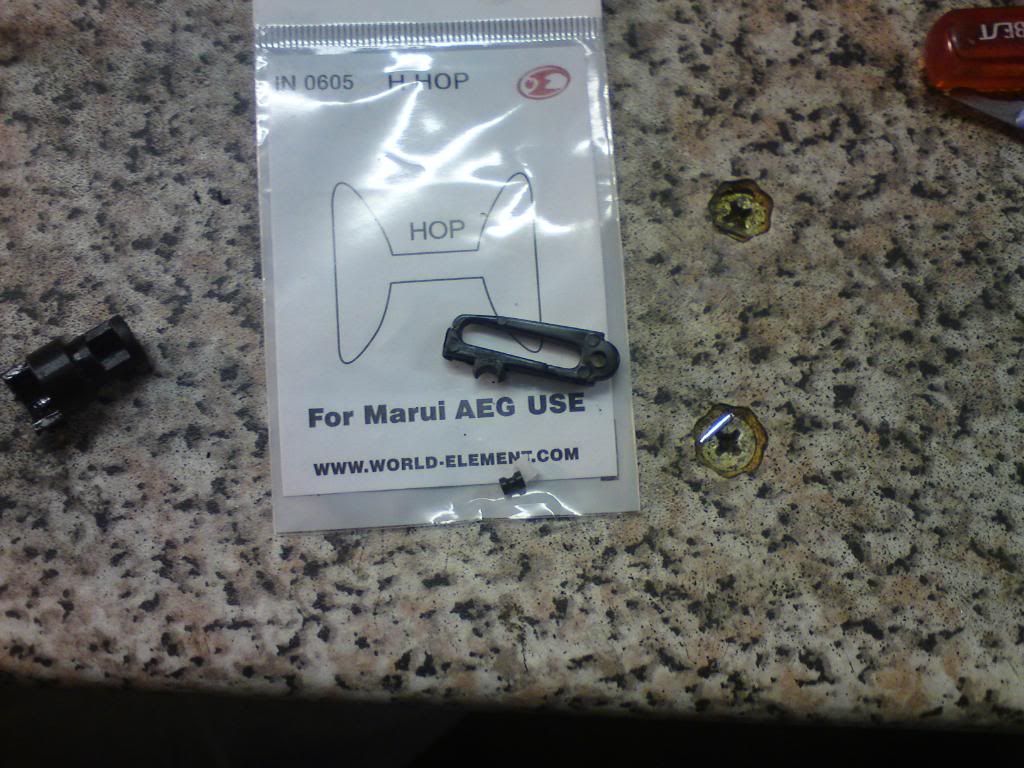

Like I said this mod uses friction to hold it together. You can use glue but I like to have the option to strip and re build. I will do a full AK hop conversion next. If only to make another guide! Sorry the photo's are a little sparse but I was doing this at 11pm the night before a game!
Post game results were good. I got lots of long range hits and grouping was tight. I did however get some hop creep but i put that down to sub zero conditions and grease migrating from the freshly built cylinder into the hop unit.
Any Qns just ask
and watch this space for the TM ak hop mod
Thanks
Dave

what length mp5 barrel did you use?

